Gradebook
What Does It Do?
The Gradebook tool in Courses offers a secure way for instructors to input, manage, and share course grade information with students.
How You Can Use It
- Structure and categorize your grading system so that activity scores reflect a proper weighting formula
- Securely share progress with students throughout the tenure of the course
- Excuse grades for students as appropriate
Table of Contents:
- Initial Gradebook Settings
- Confirm or Modify Your Grading Schema or Scale
- Add a Gradebook Category
- Add a Gradebook Item
- Grade a Gradebook Item
- Add Comments
- Excuse/Include Gradebook Item
- Statistics
- End of Term Considerations
- Important Tips and Reminders
Instructions
Important Initial Settings
Before you begin using the Gradebook tool, you should make some important decisions.
- Do you want students to see the "Course Grade"? If yes, then you must go to Gradebook > Settings > Grade release rules > and enable "Display final course grade to students." The Course Grade is a "running total" calculation. This means that the Gradebook counts only the graded items and will exclude any ungraded items from the overall calculation. If you assign a student 10/10 points for one of your grade book items, and all other items are ungraded, then the student will see the letter grade "A" as the Course Grade.
- Does the grading scale in your class syllabus match the "Grading Schema" in the Gradebook? Professors define grades differently for different levels and subjects. If you want
the "Course Grade" to reflect the appropriate letter grade for your class, be sure
to adjust the minimum values for each grade level. Go to Gradebook > Settings > Grading Schema. You may also choose a few other grading options, too. Learn more about the Grading Schema.
- "Letter Grade (93) with +/-" (Plus and minus values, e.g. A, A-, B+, etc. The "A" starts at 93. This is the default option in new class sites.)
- "Letter Grade (94) with +/-" (Plus and minus values, e.g. A, A-, B+, etc. The "A" starts at 94.)
- "Letter Grade (95) with +/-" (Plus and minus values, e.g. A, A-, B+, etc. The "A" starts at 95.)
- "Letter Grade" (No plus and minus, only A, B, C, D, and F)
- "Grade Points" (Includes both GPA and Percent Values with "A" starting at 95.)
- "Pass / Not Pass" (With "Pass" starting at 75.)
- Do you plan to use "Categories" or "Weighting"? If you plan to weight grades by different categories or even drop the lowest score from a category, be sure to explore the "Gradebook Category" section below.
- Full-Screen Mode. Full-Screen Mode is an excellent feature (as of Sakai 21) for instructors that prefer
a larger view when reviewing Gradebook items and inputting scores and comments for
their students! To enable (and disable) full-screen mode in the Gradebook, simply
click on the button shown in the screenshot below.

The above items highlight the common areas that professors commonly ask about. There are more features available in the Gradebook. Review the instructions below or in your class site tool menu click Help > User Guide > Gradebook to explore several helpful articles.
Confirm or Modify Your Grading Schema or Scale
One size does not fit all, so you should always verify that the grading scale in your syllabus matches the grading scale of your class site.
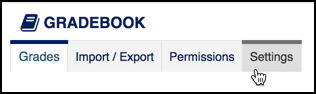
- In the Gradebook tool, click Settings.
- Select Grading Schema.
- Review the selected grading scale and compare it with your syllabus.
- If changes are needed you may:
- Select another option from the drop-down menu (e.g. "Letter Grades" or "Pass / Not Pass").
- Modify the values, setting the lower limit for each value. The values must descend from larger to smaller values (e.g. 90, 80, 70, etc.).
- Customize the labels and values, creating something unique (but must still be point-based!).
- You can add new labels by selecting "Add a new mapping."
- You can remove a label by clicking the "Remove" button.
- Again, the labels must be in the appropriate numeric order and must associate with point values.
- Select Save Changes when finished.
See additional Grading Schema details in the End of Term Considerations section.
Add a Gradebook Category
You can add categories to organize items within your gradebook. The categories offer clear headings for student activities, such as "Assignments," "Participation," "Quizzes," etc. Additionally, you can enable weighting. With weighting, the gradebook will automatically calculate grades based on the category percentages that you specify.
- In the Gradebook, click Settings.
- Select Categories & Weighting.
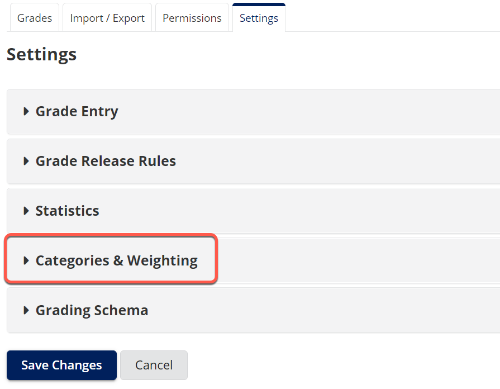
- You can choose "No Categories," "Categories only," or "Categories & Weighting."
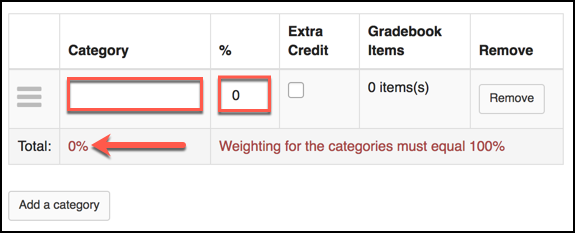
- If you have selected "Categories & Weighting," type in the category names and the percentage weight for each category. The running total will be calculated at
the bottom to help you reach 100%. Click "Add a category" to add additional categories.
- Click Save Changes at the bottom when finished.

Add a Gradebook Item
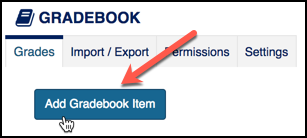
- In the Gradebook, select Add Gradebook Item.
- In the popup window, enter item "Title," "Point Value," and (optional) "Due Date."
If you have configured categories, you may also associate the item with the appropriate
category.
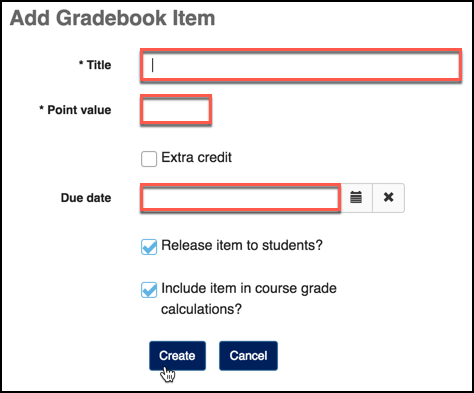
- Select or deselect the options ("Release item to students?" and/or "Include item in course grade calculations?"). Always select "Include item in course grade calculations" if you would like your students to see this score and have this score count toward their total grade. Unchecking this will exclude the item from calculations.
- Click Create when finished or click the "+" icon to create the item and immediately add another.
Grade a Gradebook Item
The instructions below refer to gradebook items created within the Gradebook manually. If you are attempting to grade an activity from the Assignments or Tests & Quizzes tool, you must grade those activities within those respective tools. The lock icon designates a column that must be graded in a different tool.
To Enter or Edit a Student Grade
- Click the cell corresponding to the activity (column) and student (row).
- Enter the points earned.
- Press "Enter," "Tab," or use any arrow key to save the grade.
Add Comments
You can add private comments to individual student scores to give feedback.
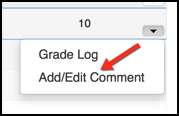
- Select the bottom right corner of a student's grade and click the arrow icon.
- Select Add/Edit Comment.
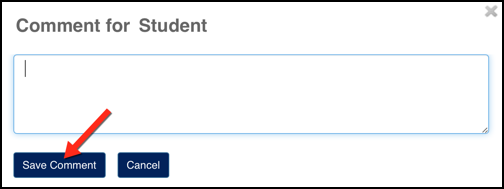
- Enter your comments and click Save Comment.
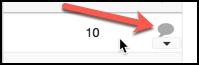
- The "speech bubble" icon inside a cell indicates the presence of a comment with a
student score. Select the "speech bubble" icon to view your comment!
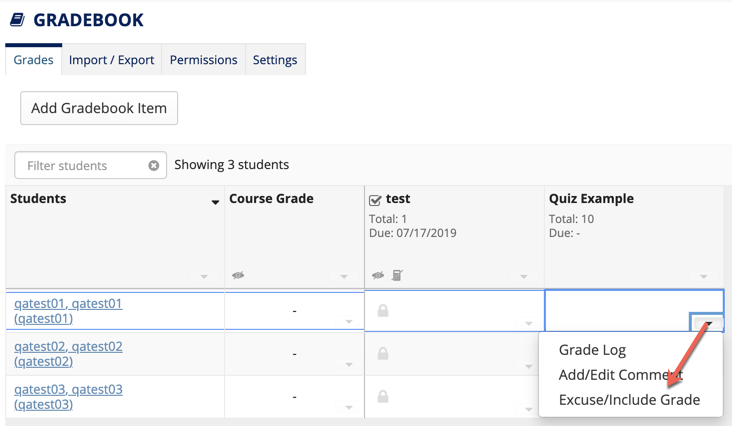
Excuse/Include Gradebook Item
This feature allows you to manually exclude or include a gradebook item from factoring into a student's final grade in a course. This feature is particularly helpful when a score has been recorded but needs to be excluded on a case-by-case basis.
- Select the bottom right corner of a student's grade and click the arrow icon.
- Click Excuse/Include Grade.
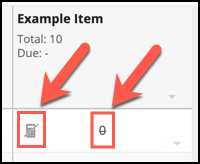
- The previously entered score will then become crossed out. Note: a crossed-out calculator icon also reflects that the score will not be factored into
the student's final grade.
- (Optional) If needed, instructors can include an excused score by following steps 1–2 immediately above.
Statistics
This feature allows site participants (i.e. students) to view high-level statistics for individual assignments (i.e. "activities") or course grades of a site. Due to FERPA, we recommend avoiding this option in small classes (fewer than 15 students, for example).
-
In the Gradebook tool, click Settings.
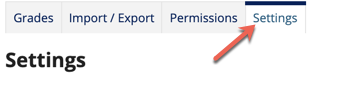
- Select the Statistics heading.
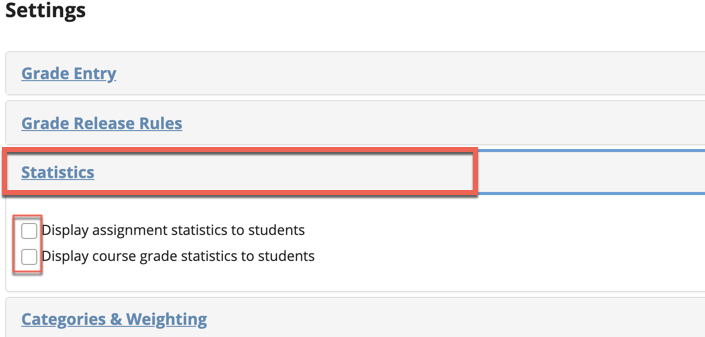
- Under the "Statistics" heading, select any of the options below:
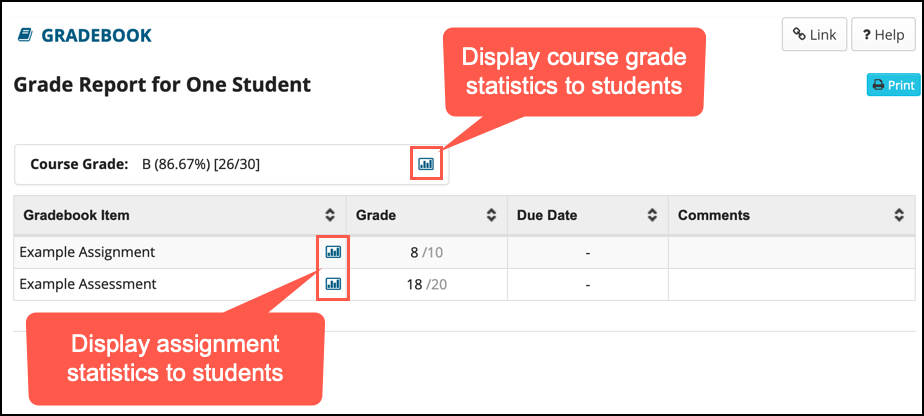
- "Display assignment statistics to students" - This allows students to view statistics for all individual Gradebook items only.
- "Display course grade to students" - This allows students to view statistics for total
class grades. Note: "Display final course grade to students" must be enabled before
students will be able to view course grade statistics. To enable this, navigate to
"Settings" and then click the "Grade Release Rules" heading to reveal this feature.
- Once selected, students can view the correlating statistics by clicking the graph
icon shown next to each line item in the Gradebook.
End-of-Term Considerations
Before you submit final grades at the end of the academic term, please review these items.
- Double-check Your Grading Schema/Scale
- Set Zero Score for Empty Cells (if appropriate)
- Ensure All Gradebook Activities are Included in Final Course Grade Calculations
- Course Grade Override
- Course Grade Distribution
- Display Course Grade to Students
- Export Your Gradebook
- Go to WaveNet to Submit Official Grades
- Seaver College WP/WF
Double-check Your Grading Schema (Grade Scale)
When you set up your Gradebook, you likely verified that the Gradebook's "Grading Schema" matches the grading scale listed in your class syllabus. If you forgot this step, be sure that you check the scale and make any adjustments as needed. You'll need to repeat this in each of your class sites.
- Go to the class site.
- Click Gradebook.
- Click Settings.
- Select Grading Schema.
- Verify that the "Grade Type" and the resulting Grade Scale match your class syllabus.
If necessary, make adjustments and click "Save Changes" at the bottom.
- "Letter Grade (93) with +/-" (Plus and minus values, e.g. A, A-, B+, etc. The "A" starts at 93. This is the default selection in most new class sites.)
- "Letter Grade (94) with +/-" (Plus and minus values, e.g. A, A-, B+, etc. The "A" starts at 94.)
- "Letter Grade (95) with +/-" (Plus and minus values, e.g. A, A-, B+, etc. The "A" starts at 95.)
- "Letter Grade" (No plus and minus, only A, B, C, D, and F)
- "Grade Points" (Includes both GPA and Percent Values with "A" starting at 95.)
- "Pass / Not Pass" (With "Pass" starting at 75.)
This will ensure that the overall course grade calculated by the Courses Gradebook will align with your syllabus grade scale.
Back to End of Term Considerations.
Set Zero Score for Empty Cells
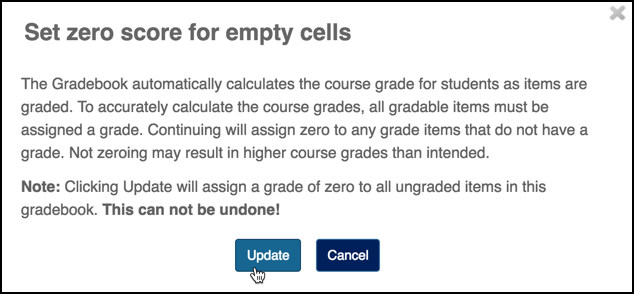
Professors must assign a 0 to missed tests, assignments, or other "Gradebook" items. There is a one-click option to accomplish this at the end of the semester.
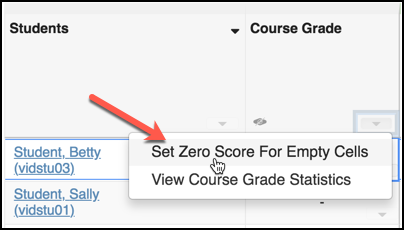
- Within the "Course Grade" header column, click the drop-down arrow and select "Set
Zero Score for Empty Cells."
- Click "Update." Note: This action cannot be undone.
Back to End of Term Considerations.
Ensure All Gradebook Activities are Included in Final Course Grade Calculations
Professors need to ensure that all Gradebook activities are properly included in final course grade calculations.
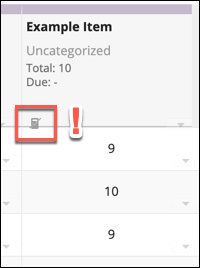
- For each Gradebook item that you wish to be included in course grade calculations,
be sure that you do not see a calculator icon at the top left of the column. If you
do see a calculator icon, this means that the Gradebook item is not being factored
into final course grade calculations.
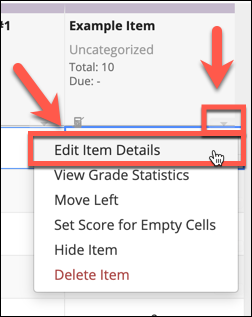
- To fix this, the item either needs to be categorized properly and/or be configured
to be included in course grade calculations. First, click the drop-down arrow in
the corresponding cell and select "Edit Item Details."
- If you are using categories and weights, then be sure to assign the item to its proper
category. Else, select the option to "Include item in course grade calculations."

- Click Save Changes.
Back to End of Term Considerations.
Course Grade Override
Professors can override the calculated course grade for any particular student.
- For a specific student, click the corresponding drop-down arrow within the course
grade column and select Course Grade Override.

- Specify the letter grade with which to override the calculated grade (do not enter
a number; enter the letter grade). Then click Save Course Grade Override.

Back to End of Term Considerations.
Course Grade Distribution
Professors can see the overall course grade distribution and common statistics.
- Click Settings.
- Click Grading Schema.
- Next to the grading schema table is a chart of your course grade distribution. Below the chart, you will find statistics like average, median, highest, lowest, and count.
Back to End of Term Considerations.
Display Course Grade to Students
If you have chosen to hide the overall course grade from students during the term, you will want to choose whether to display the Course Grade to students at the end of the term. If students report that the Course Grade says "Not available yet," then you have not enabled the display of the overall Course Grade.
- Click Settings.
- Select Grade Release Rules.
- The two options available:
- "Display released Gradebook items to students" - This should be selected by default. If you deselect this item, then students will not see any of their individual grades in the grade book; none of the individual grade book item grades will be visible.
- "Display final course grade to students" - If you enable this feature, then the overall course grade will display to students. This is important at the end of the semester if you want students to know the final grade computed or the override grade that you have entered. You will have different choices depending on whether you enter grades as points/percentages or use weighting by categories. If you use weighting, the option to display points will not be available.
- Click Save Changes to finish.
Back to End of Term Considerations.
Export Your Gradebook or other class data
Professors can export the Gradebook data for their class sites at any time throughout the semester. The exported file is in CSV format, but can afterward be resaved in different Excel formats as needed. It is recommended to export the Gradebook within 60 to 90 days of the end of the course term. Remember, once students graduate, their accounts with be deactivated. Deactivation happens roughly 90 days after a student has graduated. This is especially important for professors that teach classes in the final years or terms of an academic program.
- In Gradebook, click the Import/Export tab.
- To export your Gradebook with default settings, simply click the "Export" button.
Else, click "Custom Export" to include specific data points which you need.
- If you click "Custom Export," specify the options you would like to include or exclude in the file output.
- (Optional) You may also filter the output by the entire class or by a specifically selected group.
- Once finished, click "Download Custom Export."
- The exported file will download to the location saved in your browser settings. In most cases, this will be a "Downloads" folder on MAC or PC but may vary depending upon your browser settings.
- Be sure to open the file to verify the desired output.
Please find more information about exporting Gradebook.
Save Other Courses LMS Class Data
Want to export or download information from another Courses LMS tool? Please view the relevant tool information in our Courses Faculty Guides, refer to the Download Your Older Courses LMS Content, or search the built-in "Help" page on Courses (select "Help" in the Courses LMS left tool menu). Examples of content you may wish to download or export:
- Download exemplary assignments
- Download representative midterm or final exam results
- Save great Discussion Topic threads as PDF files
As always, be mindful of FERPA as this content relates to student records. Any content that you retain must be protected and cannot be shared publicly without formal, written authorization from each student.
Back to End of Term Considerations.
Go to WaveNet to Submit Official Grades
Once you have computed the final course grades for your students, you must go to WaveNet and complete the Grade Roster and post the end-of-term grades. Each school maintains its own schedule for grading deadlines. Please contact your school program or division office to learn about any grading deadlines.
Learn about the Grade Roster in WaveNet to submit your final grades.
Back to End of Term Considerations.
Seaver College WP/WF
When a student drops or withdraws (W) from a course, the person's name is removed from the class roster. None of the person's data is deleted, but the student is "dropped" and his/her name will no longer appear in the class roster and the person no longer has access to the site.
Seaver College has an extended withdraw period that requires a grade determination of "WP" (withdraw with passing grade) or "WF" (withdraw with failing grade). When a student withdraws during this period, the student's name remains in the official site participant list, but his/her status is marked as "Inactive." This status hides the site from the student and hides the student's name from all site tools (such as Gradebook, Assignments, Tests & Quizzes, etc.). This special status also makes it easy for the professor to temporarily turn the student "active" again to view the past grade activity.
If a professor needs to determine whether a student earned a "WP" or "WF" grade, then the professor will follow these simple steps:
- Go to the class and click Site Info.

- Select the Manage Participants tab at the top of the page.
- Find the name of the student in the participant list.
- Change the student's status from "Inactive" to "Active."

- Scroll down and click Update Participants.

- Visit the Gradebook or any other tool to review the student's previous activity and determine the person's grade status at the time the student withdrew. Any grade other than an "F" is considered a passing grade, and thus "WP."
- Once done, return to "Site Info" and change the student's status back to "Inactive" and then click "Update Participants."
Back to End of Term Considerations.
General Gradebook Tips and Reminders:
- Avoid data loss! When inputting scores, be sure you have closed any other Courses browser tabs and windows. If you have more than one Courses browser tab or window open, it could prevent data from being saved accurately.
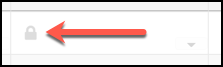
- Some grades must be entered or edited via select tools. Items linked from the "Assignments" and "Tests & Quizzes" tools will be reflected
in the Gradebook but cannot be edited in the Gradebook. Corresponding cells for these
items will always contain a "lock" icon indicating as such (see image directly below).
Please go to those specific tools to manage student scores.
- Pre-created Discussions/Forums grade book items. If you plan to grade discussion topics in the Discussions tool, always create the "gradebook items" first, and then link them to the specific topics in the "Discussions" tool. Please be aware that it can take approximately 30 seconds after you have created a Gradebook item for its title to be available within "Discussions." Please be patient and refresh your web browser if necessary.
- Ordering Gradebook items. The Gradebook will first order items chronologically and then by alpha-numeric sorting
based on the title in the student view.
- We recommend that if you want to maintain a specific order for your students, you should name your Gradebook items by number. For example: "Paper 01," "Paper 02," etc.
- For items with an existing numbering technique, we recommend using a leading zero. For example: "Week 01: The Kennedy-Nixon Television Debate" instead of "Week 1: The Kennedy..."
- Drop Lowest/Keep Highest Requires the Same Point Value for All Items in the Category. If you plan to use the drop lowest/keep highest options with a category, all items within the category must have the exact same point value (i.e. all items must be worth 10 points or whatever consistent value you choose). You cannot associate a grade book item with a drop lowest/keep highest category if it has a value that is different from the series or the first item.
See Also
← Back to Faculty Guides for Courses