Using the Section Info Tool in Courses
What Does It Do?
The "Section Info" tool allows professors to set up multiple sections within a class site, such as lecture sections, labs, or other groupings of students. This can be helpful when multiple class rosters have been added to a site. Whether the tool has been added or not, the basic feature will function automatically to create a different "group" for each roster section added to a class site. If instructors are happy with this automatic process, then no additional work is needed and the tool does not even need to be added to the site.
However, instructors may choose to manually create and configure sections within this tool. This process allows more options to create different types of sections (e.g. "labs") and set different dates, times, or teaching assistants for each of these manual sections. If this goal is desired, then follow the steps below.
How You Can Use It
- Automatically benefit from the creation of sections when class rosters are added to a site (no further action is needed).
- Manually create and configure course sections, if desired.
- Assign TAs to specific course sections (whether automatic or manual sections).
Considerations
- Automatically-created sections are updated as roster enrollment is managed on a daily basis. When students add or drop the class, you don't need to take any special actions; enrollment is managed automatically.
- Manually-created sections are not automatically updated if students add/drop the class. If you choose to create special sections within your class site, you will need to routinely update the section membership accordingly.
- If you wish to create unique student groups or teams for class activities (e.g. team assignments), do not use Section Info. Instead, please use the Manage Groups feature in the "Site Info" tool.
Instructions
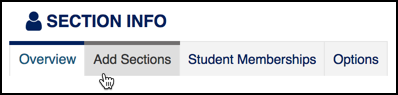
- Add the Section Info tool to your site. Add it by Site Info > Manage Tools.
- Select the Section Info tool in the left menu.
- Review the table of the automatically-generated section(s) based upon each attached
class roster.
- If instructors are happy with these results, then no additional work is needed and ignore the remaining steps.
- If instructors would like to manually adjust these sections or create new ones, select the Options tab.
- Select the option "Manually manage sections and membership (discontinues section and membership updates from the registration system)" and click Update.
- Click Confirm.
- Remove the automatically generated section(s).
- Select the “Remove” checkbox corresponding to each section.
- Click Remove Sections.
- Click Add Sections.
- Select the number of sections to add (e.g. "2") and choose the category (e.g. "Lecture").
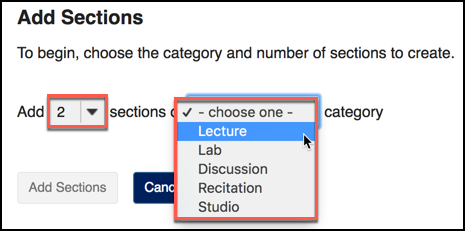
- (Optional) You may add additional details if desired. Options include customizing the name of each section, the day(s), start/end time(s), etc.
- Click Add Sections.
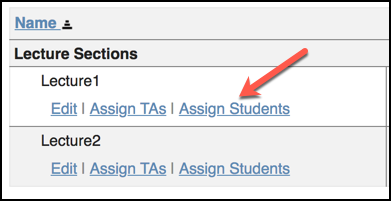
- Select the Assign Students link under the first section (the current class site).
- Select the desired students and move them to the corresponding section.
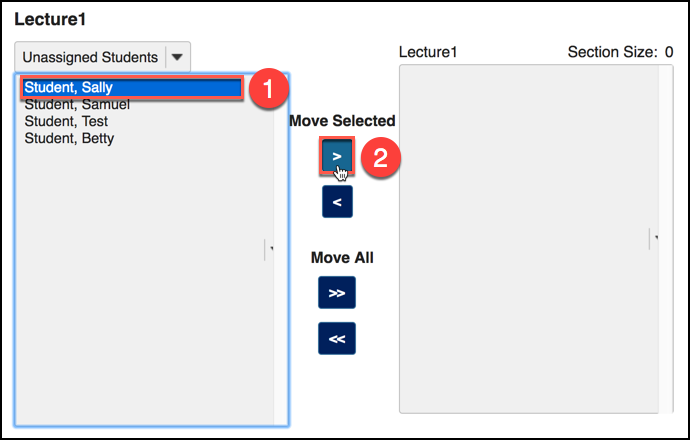
- Click Assign Students when finished. Repeat steps 12–14 for each section.