Beyond Bold Text
The Why and How of Creating Proper Headings in Your Writing
Who Should Read This Article?
- All faculty
- All employees who create any documents, webpages, etc.
Quick Summary
- Always use formal headings to structure your papers, documents, webpages, etc.
- Don't rely on only formatting to indicate a heading in your content.
- Avoid using the "Title" or "Subtitle" headings in Microsoft Word or Google Docs; use Headings 1-6 instead.
- Don't jump multiple levels of heading in subheadings (don't skip from Heading 2 to Heading 5, for example).
- Use only one Heading 1 in a document as the title.
The Case for Proper Headings
Imagine that you are reading a paper. It's a wall of text with no guidance about the types of information in the document or their relative importance. How do you navigate it? How do you quickly find the information you need?
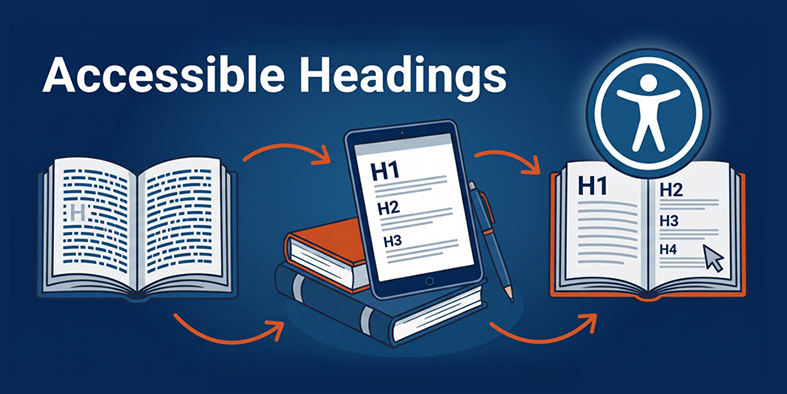
For students (or anyone!), this is a real challenge. And for people using assistive technology to process information, it becomes even more difficult. Even if you apply formatting to try to indicate the structure or reading order, you only help some, not all, of our community. Formatting provides a visual illusion of organization, but to a screen reader, it's the equivalent of plain text. Using formal headings provides genuine structure to information and will prevent anyone who relies on assistive technology from facing that overwhelming and frustrating "wall of text."
At Pepperdine University, each of us is called to "Do Unto Others." Therefore, taking a few seconds to add and mark headings in your documents or webpages is the right thing to do to answer this call and help deliver on our University mission.
Beyond mission, morals, and legal requirements, there are other benefits to using headings.
The Benefits to You of Using Headings
- Provides a Document Outline in Microsoft Word and Google Docs so you can quickly navigate your work
- Allows tools like Microsoft Word or Google Docs to create an automatic Table of Contents
- Offers an easy way to apply formatting changes to all headings in seconds
The Benefits to Others of Using Headings
- Provides a Document Outline in Microsoft Word and Google Docs to quickly navigate the work
- Eases cognitive load by making a document easier to read, navigate, and search
- Supports assistive technologies to meet legal and ethical requirements
Best Practices for Headings
 Use a Clear, Structured Reading Order
Apply headings to provide a hierarchical or logical reading order to your content. Examples of using headings:
- Heading 1: Reserve for the document or paper title. There should only be one instance of Heading 1 in your document.
- Heading 2: Use this for major section or chapter headings.
- Heading 3: Use for sub-sections of each heading 2.
Don't Skip or Jump Multiple Heading Levels
As you write your content, do not skip heading levels when drilling down to subheadings. For example, don't jump from a Heading 2 to a Heading 5 simply because you like the formatting or font size of the latter heading. A well-structured outline might look like:
- Heading 1
- Heading 2
- Heading 3
- Heading 2
- Heading 3
- Heading 4
- Heading 3
- Heading 3
- Heading 2
Avoid Empty Headings
An empty heading is a line with no text content (or contains only an image), yet it has been formatted with a heading style. This often happens when you want blank space above a heading and press the Enter or Return key on the line with the heading. Be sure to select the blank line(s) and set them to Paragraph or Normal styling, not a heading level. Better yet, don't use excess blank lines at all! Instead, adjust the line spacing. Whether you adjust the spacing of the paragraph before the heading or the heading itself, use line spacing to add any white space, padding, or visual buffer between one element of your document or page and another.
Avoid Using the Title and Subtitle Styles
In Google Docs, for example, the "Title" and "Subtitle" styles are not part of a document's structure. This means they will not help people who use assistive technology. Instead, avoid those styles and only use the standard Heading 1-6 options.
Don't Apply a Heading to Non-Heading Text or Content
We know it may be tempting to increase the font size of select text as a callout or as special emphasis. However, do not use a formal heading to accomplish this goal. Reserve heading styles for headings; don't use the headings as a shortcut for formatting other elements of your content. Manually apply the desired formatting to the text you wish to emphasize, or explore options such as Blockquote to accomplish your design goals. Again, don't place a heading on normal paragraph content simply for visual impact.
How to Add Formal Headings to Your Content
Learn how to apply headings to your content. Select a platform below to expand the instructions.
Additional Resources
Thank you for supporting all members of our Pepperdine community by adopting digital accessibility best practices!