Discussions: Add Forums and Topics in Courses
What Does It Do?
The Discussions tool creates an online space for both students and professors to have discussions and share public messages with one another. Unlike other tools, such as Messages or Commons, Discussions provides a more formal environment for students and instructors to share thoughts and ideas.
How You Can Use It
- Engage students in asynchronous discussions around textbook items, attached documents, or other topics.
- Embed pictures, audio, or video files and then have students discuss or comment on them.
- Encourage debate and discussions outside of class time.
- Encourage participants to build community in the course through discussion and "ice-breaker" activities.
Important!
You must create Topics to facilitate conversation. A Forum is just a heading. If you only create a forum, then students will not be able to respond. We advise using only one "Forum" per class (e.g. your class name or "Class Discussions") and create multiple "Topics" for each of your discussion activities.
Instructions
Setup a Forum Topic
- Click the tab for your course or project site.
- Click Discussions in the tools menu. A "Forum" is just a heading that groups multiple
Topics. The conversations happen inside "Topics." If a forum does not contain at
least one topic, then students cannot participate in discussions.

- Click "New Topic."

- Enter the Topic Title.
- Enter a Short Description. This description is quickly viewable by students and is strongly recommended.
- (Optional) Enter a full Description. The rich text editor offers more room to explain the objectives for the discussion and even embed images or videos.
- Click Add attachments if you want to upload documents for the discussion.
- Topic Posting:
-
"Lock Topic (Disable topic postings)" - Choose this option to prevent participants from replying or posting new conversations. Participants can still read the previous messages in the topic.
-
"Moderate Topic" - Choose this option if you want to read and approve every message before other participants can view them. While this setting may be appropriate in some K-12 settings, it's rarely used in higher education.
-
"Require users to post before reading" - Choose this option if you want participants to post their own thoughts before reading postings by other users.
-
"Posts are anonymous" - Choose this option if you want to anonymize posts within the topic. Note: This setting cannot be changed after you create the topic, so weigh this option carefully now.
-
- Availability:
- "Show immediately" - This option makes the topic visible to participants once you save it.
- "Specify dates to open and/or hide" - This option allows you to hide the topic until
a release date and/or hide the topic after a future date. You choose to set just
an open date, just a hide date, or both. Note: The hide date will hide the topic
from participants after the date specified (meaning they can no longer view any messages
in that topic).
- (Optional) Instructors may check the option to "Allow users to view discussions after hide date (read-only)." This will set a topic to be in read-only mode after the hide date elapses.
- Notifications:
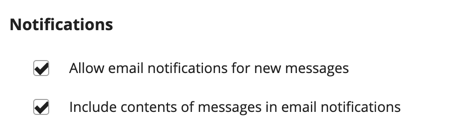
- Allow email notifications for new messages" - This option gives instructors the ability
to allow or prevent email notifications to be generated when new messages (i.e. "posts")
are added to the topic. This setting can be particularly useful in cases where email
notifications are not appropriate for sensitive or confidential topic conversations.
Note:
- Email notifications are only sent to students who have opted-in via the "Watch" tab at the top of the Forums tool.
- "Includes contents of messages in email notifications" - This option gives instructors
the ability to allow or prevent email notifications to contain the contents of the
messages (i.e. "posts") that were posted. This setting can be particularly useful
in cases where email notifications are not appropriate for sensitive or confidential
topic conversations. Discussions Notifications.
- Allow email notifications for new messages" - This option gives instructors the ability
to allow or prevent email notifications to be generated when new messages (i.e. "posts")
are added to the topic. This setting can be particularly useful in cases where email
notifications are not appropriate for sensitive or confidential topic conversations.
Note:
- Mark All Messages in Conversations Read:
- Choose this option if you do not want to display the "New" label for unread messages. Normally, participants need to manually mark each message as read by clicking the envelope icon or clicking the "Mark All as Read" button. With this option selected, all messages in a conversation will be marked as read once you open the first message.
- Grading:
- If you have already created a gradebook item to enter numeric grades or text comments for this discussion item, you may select it from the drop-down menu. After you create a gradebook item, it can take 1-2 minutes before it will appear in the drop-down menu. Refresh your web browser if necessary.
- Permissions:
- Set the desired permissions for each role.
- TIP: For the "student" role in class sites (or "access" role in project sites), we recommend that you click "Customize". Adjust the "Contributor" options under the "Edit Messages" heading, select "Own" to allow participants to edit their own postings.
- Permission Levels are pre-configured options to meet a variety of common use-cases.
The available permission levels are:
- "Author" - This level would be appropriate for very trusted users, like teaching assistants, who need expanded options. This level can create topics, start conversations, modify settings, and more. This role cannot moderate messages or identify anonymous authors by default. They also cannot edit or delete the messages of others (but can edit or delete their own messages).
- "Contributor" - This is the default level for students or access users. It is intended for users that will post, reply, and read messages. As mentioned earlier, we recommend that most professors customize student and access roles to be able to edit their own messages. We strongly discourage assigning any additional options to student or access users.
- "None" - This disables all access for the role in question.
- "Nonediting Author" - This level is similar to the Author level but removes the ability for users of this level to delete messages.
- "Owner" - This is the default level for instructors or maintain users. It grants full control (all available options) for the forum or topic, so it should only be granted to trusted roles. We strongly discourage instructors granting this level to students or access users, since they could accidentally delete content, view anonymous authors, etc.
- "Reviewer" - This is a basic level that would allow a role to view (read) messages only.
- "Custom" - This option will display if any of the levels are edited. It also allows for a fully customized set of options for a role.
- Click Save.

TIP:
Want to receive notices that someone has posted to your discussion topics? Use the "Watch" feature. This feature is available for professors and students on the home page of the Discussions tool. Click "Notifications" and then select the desired option. Provided that the instructor has enabled notifications for the respective topic, it will send an email notice when anyone posts a message to any topic or conversation in the Forums tool.
Grade a Forum Topic
Note: Grading a topic requires instructors to create a Gradebook item and select it when configuring the topic settings. See documentation above under "Grading" for gradebook setup.
- In your class site, click "Discussions" in the left tool menu.
- Next to the specific forum topic title, click the "More" drop-down and select the
"Grade" option.

- On the resulting page, you will observe a table showing the following:
- Name: When clicking the student's name, instructors will be able to see a preview of the student's post(s).
- Details: When clicking the "Details" link adjacent to a particular student's name, this view will reveal additional details about all of the student's posts.
- Authored: The number in this cell indicates the number of posts authored by the student. This number includes new posts/threads and replies.
- Read: This number indicates the number of posts and replies that the student read.
- Unread: This number indicates the number of posts and replies that the student did not read.
-
Percent Read: This percentage indicates the ratio of posts (and replies) read to all available posts and replies.
-
-
- Click the "Grade" button corresponding to the student you would like to grade.
- Note: If you would like to score all students at the same time, click the "Select a Gradebook item" drop-down and select the corresponding activity.
- Verify that the correct Gradebook item is listed in the drop-down.
- Specify a point value for the student's score.
- Type in any comments you would like to leave for the student.
- Click "Submit Grade."
Statistics
The Discussions tool offers several statistics that can assist professors with assessing engagement and discussion.
Caveats
- Students need to get into the habit of marking conversations as "Read." Simply viewing a page doesn't mean someone has actively read the content.
- When students author a post or a reply, they will automatically receive credit for reading their own post. This may elevate the tallies, so factor this into any assessment of student work.
Instructions
- Visit the class site.
- Select the Discussions tool.
- Select the "Statistics and Grading" tab. Summary statistics will display.
- Select a student's name to view details about that student's statistics. A table of
"Messages Authored" and "Messages Read" will display, if the person has contributed
to any discussions in the site.
- Remember, students will receive a "read" credit for their own posts. This may elevate their "read" value.
- Students should be sure to mark each conversation as read to receive the appropriate credit in the faculty statistics view.
- In the "Messages Authored" section, select "Grade" to grade a post for the associated grade book item (if applicable).
- In the "Messages Authored section, select "display in conversation" to review the post in the context of the specific thread and other messages.
See Also:
- Create a group forum
- How to embed a TED Talk video into a discussion forum
- How to embed a YouTube video into a discussion forum
- How to embed a Prezi into a discussion forum
- "Midnight Assignments - How do you set the date and time?"
- "Use 'Watch' to receive email notifications in Forums"