How to Create and Use an Assignment Folder in Panopto
What Does It Do?
Assignment folders in Panopto are a wonderful way to host and (optionally) showcase student-created, video content. These videos can be uploaded by students, and shared by way of instructor preference.
Important Note: Instructors have full access and control over students' uploaded content in the Panopto assignments folder.
How You Can Use It
- Use the Panopto tool as a staging ground for student video uploads
- Allow students to view the videos of their peers
- Allow students to post links to their videos in other tools (i.e. Forums, Assignments, etc).
Instructor
Student
- Upload a Video to the Assignment Sub-Folder
- Sharing Your Video Outside of the Panopto Assignment Folder
Create the Assignment Sub-Folder
- Sign in to Courses (Sakai), and navigate to your course site.
- Locate the Panopto tool in your course site tool menu. Note: if the tool does not appear in the tool menu, then add it through Site Info > Manage Tools.
- Click the "Panopto" tool in the course site tool menu.
- Click the "Gear" icon.

- In the "Overview" tab underneath the "Assignment Folder" header, click the "Create
Assignment Folder" link.

- You will now observe that an "assignments" folder has been generated. Note: this
is a sub-folder of the Panopto course folder. The default name of this sub-folder
will always be the same as the course folder, except appended with "[assignments]."
![The new folder will now include the text "[assignments]" to designate that it is the new assignment folders.](/techlearn/images/sakai-panopto-assignments-created-assignments-folder.png "How to Create and Use an Assignment Folder in Panopto")
-
Click the "X" to close out of the Panopto folder settings dialogue.

Configure the Assignment Sub-Folder Settings
- Click the new assignment sub-folder to drill down into it. Note: the sub-folder icon
will contain a small red dot on the folder icon.

- Click the "Gear" icon.

- (Recommended) Click the "Settings" tab and then click the checkbox corresponding to
the option of "Allow viewers to see each other's sessions." Note: This setting will
allow students to view videos that other students have also uploaded into this assignment
folder.

- (Optional) Configure any other settings as desired.
- Allow viewers to make notes public - Notes are a powerful feature in Panopto that allow viewers to input notes at specific reference points in the video. By default, notes are private, but individuals do have the option to make these notes publicly viewable to other viewers of the video. This option allows instructors to either allow or prevent viewers from making their notes public.
- Email viewers when new videos are ready - This option is not recommended at this time.
- Disable comments on all sessions in this folder - Comments are not the same thing as "notes." A comment refers to feedback or general commentary that a viewer can add within the "Discussion" tab of the video in Panopto. If desired, instructors can disable this "Discussion" tab feature for all videos in the folder.
- Click the "X" to close out of the Panopto folder settings dialogue.

Upload a Video to the Assignment Sub-Folder
- Sign in to Courses (Sakai), and navigate to your course site.
- Click the "Panopto" tool in the course site tool menu.
- Click the Assignments sub-folder to access its contents. Note: You may not see the
videos that other students have uploaded depending upon your instructor's setting
preferences.

- Select the "Create" drop-down menu and click the "UploadMedia" option. Note: Students
do have the option to download Panopto's capture software for video creation.

- Now, either drag-and-drop a video file into the region surrounded by the perforated
edges or click within the region to browse for the video file.

- Important: Do not close the window. Wait for the video(s) to fully upload. You may view the upload
progress at the bottom of the dialogue.

- Once the upload has completed, you may click the "X" at the top of the window to close
the upload dialogue.

- You should now see your uploaded video populate in the Assignments sub-folder.
- Note*: Before the video may be streamed, it may take several minutes for the video to process after the upload has completed.
- Note**: Depending upon your instructor's settings, you may or may not be able to see
other students' videos populate in this folder as well. If you are permitted to see
other student's videos, then bear in mind that you can only control the settings and
properties of your own video file(s).
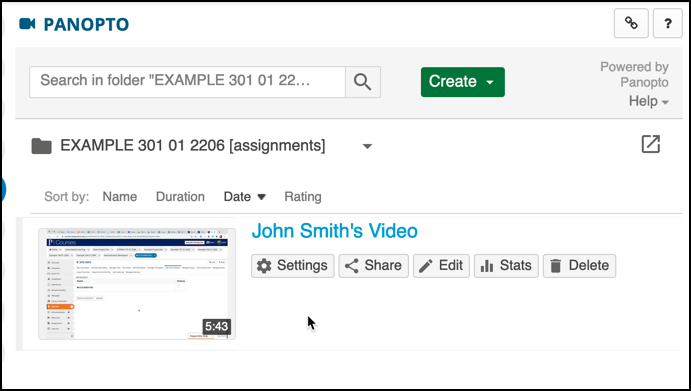
Sharing Your Video Outside of the Panopto Assignment Folder
Students may wish to link or embed their uploaded video(s) into another activity, such as a Forum discussion, a Blog, or even a Google Doc. To accomplish an objective like this, please follow the steps below.
- In your course site, navigate to the Panopto assignment sub-folder where you uploaded your video(s).
- Locate and hover your mouse cursor over your video to reveal its options and settings.
- Click the "Share" option.

- A dialogue window will prompt you to specify who should have access to this media.
Be sure to select a setting of "Anyone with the link."

- Important: Click "Save Changes" to confirm.

- You have two (2) options for how to share your content.
- Option 1: Link
- Click the "Link" option (it usually is selected by default) and then copy the entire
link to your clipboard.

- You can now paste that link into any correlating activity.
- Click the "Link" option (it usually is selected by default) and then copy the entire
link to your clipboard.
- Option 2: Embed
- Click the "Embed" option.
- Adjust the embed settings to your liking.
- Click "Copy Embed Code" to copy the code to your clipboard.

- Option 1: Link
- (Optional) If you selected the "Embed" option and you would like to embed the code
in an activity that utilizes the CKEditor in Courses (i.e. Forums, Inline Assignments,
Blogs, etc.), then there are additional steps. In the CKEditor:
- Click the "Source" button in the CKEditor.

- Paste the embed code into a blank space in the editor.

- (Optional) Click the "Source" button once more to see a preview of the embedded content. Note: The video will not be playable in the editor. It will simply show up as an iframe.
- Scroll down and click "Post" when finished.
- Click the "Source" button in the CKEditor.