Asking an Audio Question on an Assessment

What Does It Do?
Audio-based questions offer an alternative strategy to pose questions on exams. While such questions may appeal more broadly to contexts of foreign language acquisition, there are a number of possible scenarios where instructors may benefit from posing questions in this format.
How You Can Use It
- Pose an audio-question in a variety of different question types
- Allow students to listen to the audio question as many times as needed to provide an answer
Accessibility Notice: In the event that a student has a hearing or speech accommodation, the professor would need to work with the Office of Student Accessibility (OSA) to assess alternative options for the specific student.
Recommendations
- Speak clearly into the microphone. Preview/test as needed to ensure a good audio level.
- Prepare students that a question(s) with an audio recording will be on the upcoming exam. Students will need to have their speakers enabled and set at a comfortable volume to listen to the question(s).
- As always, Chrome or Firefox are recommended browsers to students when taking an exam.
Instructions
- Begin creating/editing an assessment in the Tests & Quizzes tool. Note: for instructions on how to begin creating assessments, please see additional guides on Tests & Quizzes.
- Select a question type (i.e. Multiple Choice, T/F, Short Answer/Essay, etc.).
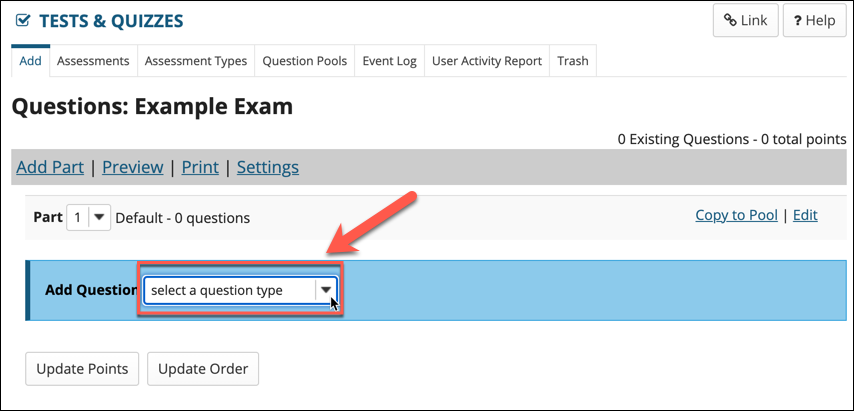
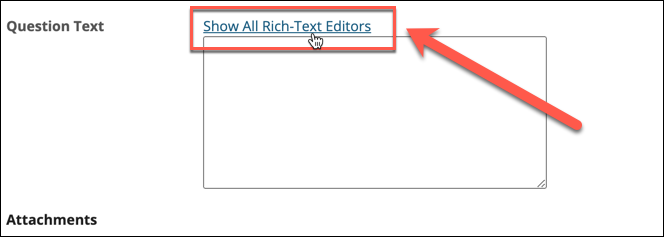
- Scroll down to the question field and click the "Show All Rich-Text Editors" link
above the field. This will allow the instructor to utilize the functions of the Rich
Text Editor in the question field.
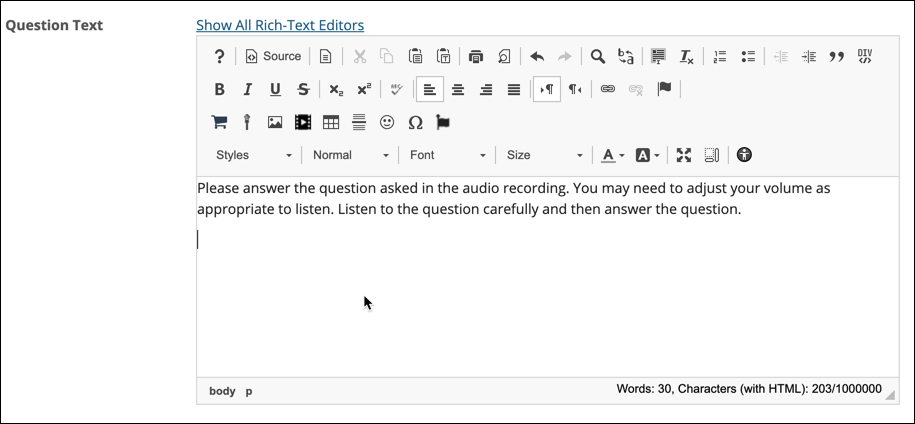
- Once in the Rich Text editor, place the cursor in the editor and press the "Enter"
keyboard key a few times. This will allow an instructor to supply any needed instructions
in front of the recording that will follow. Alternatively, the instructor can always
type up the question first.
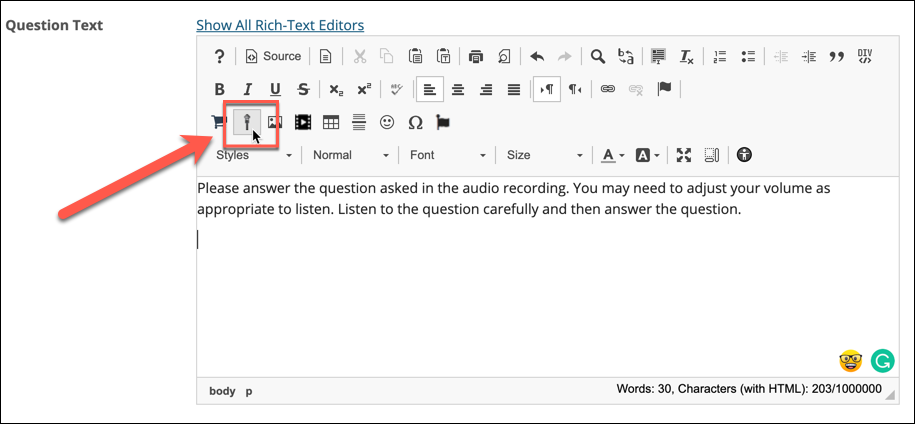
- Now, click the "Recording" button on the Rich Text Editor.
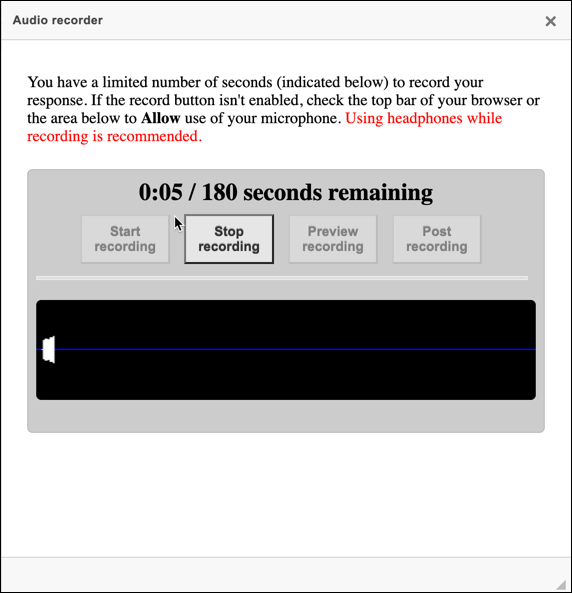
- Use the audio recorder interface to start, stop, preview, and then finally, post the
recording in the Question field. Note: a recording can only be up to three minutes
in length.
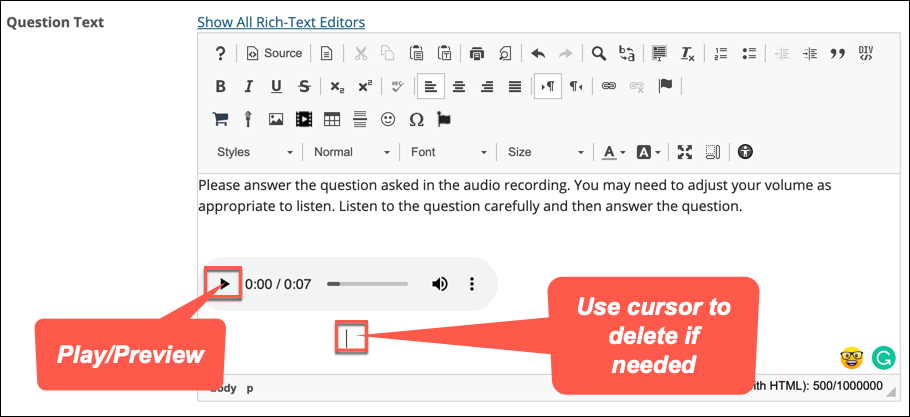
- Once the recording has been posted, it can be previewed again or even deleted as needed
in the Rich Text Editor.
- Set any other question configurations as needed.
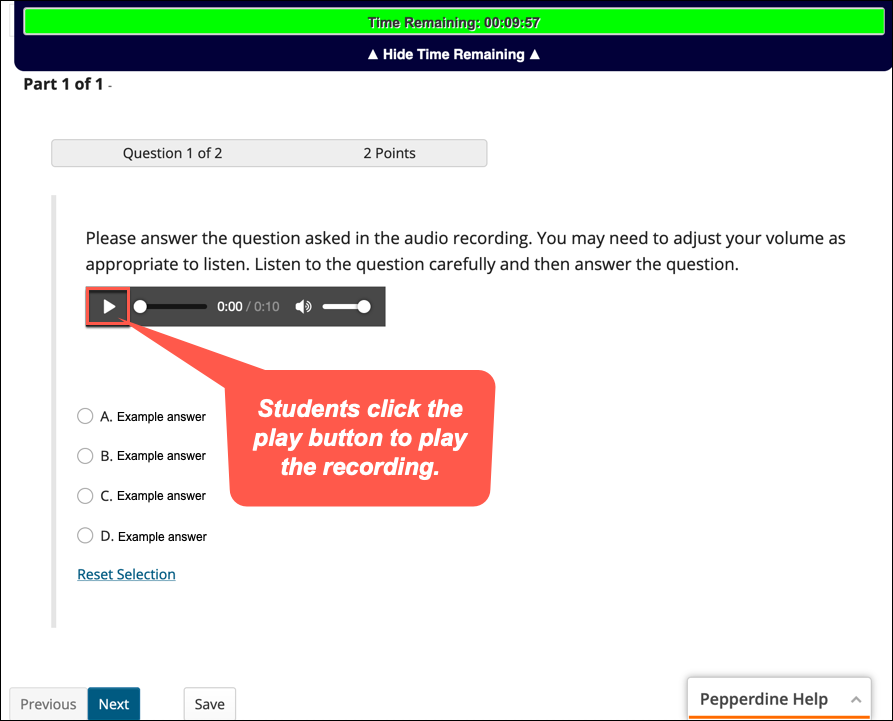
- Once the exam is published, this is a preview of what the audio question will look
like to the student.
See Also:
- Tests & Quizzes
- Question Types in Tests & Quizzes
- Settings in Tests & Quizzes
- Faculty Training Session | Tests & Quizzes Tool
- Handout: Top Faculty Gotchas to Avoid