The Tests & Quizzes Tool

What Does It Do?
The Tests & Quizzes tool helps professors conduct assessments, whether during a live, in-person class or asynchronously. The tool offers many useful features: timed tests, auto-grading, feedback for objective-style questions, randomization of questions or answers, and much more. There are many available question types such as multiple-choice, true/false, fill-in-the-blank, matching, and more.
Whether you are looking for a formative or summative assessment tool, Tests & Quizzes can deliver.
How You Can Use It
- Promote student preparation (or even take attendance) through small quizzes prior to or at the beginning of a class session.
- Administer surveys to evaluate student attitudes or even conduct midterm course evaluations to help guide your instruction.
- Use it more traditionally as an assessment tool for an exam to measure various levels of student learning, ranging from recalling information to demonstrating critical thinking.
Recommendations:
- Always offer students a practice quiz before administering a high-stakes exam. This will help them feel comfortable with the format of the online assessment and also help you iron out any wrinkles.
- Share the student test tips with your classes for more successful quiz or exam experiences.
- Preview your tests. Use a guest account or enroll a colleague as a "student" in a class to review an assessment before you release it to your students. You may also want to draft your test in a separate project site for added security.
- Avoid student data loss! We strongly recommend that you release questions one at a time rather than all on the same page. If you present the questions all on the same page, you run the risk of students forgetting to save their progress and -- in the event of a power outage, internet problem, or quitting the browser by mistake -- they may lose their answers. Presenting one question at a time saves their progress as they move through the quiz or test.
- Avoid your own data loss! When scoring exam questions (especially adjusting scores or adding grader notes), be sure only to use one browser window (close all other Courses browser tabs and windows). In addition, be sure to save regularly and often.
- Sign up for a one-on-one consultation to learn more about the tool and how it can meet your assessment goals.
Instructions
- Go to your class site.
- Select "Tests & Quizzes" in the tools menu. If the tool is not listed, add it by navigating to Site Info > Manage Tools.

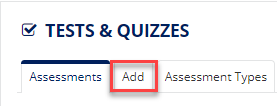
- Select the "Add" tab at the top of the tool to begin creating a new assessment.
- In the "Create from Scratch" box, enter an Assessment Title (e.g. Quiz 1, Midterm Exam, etc.).
- Choose "Create using assessment builder."
- Select the "Create" button.

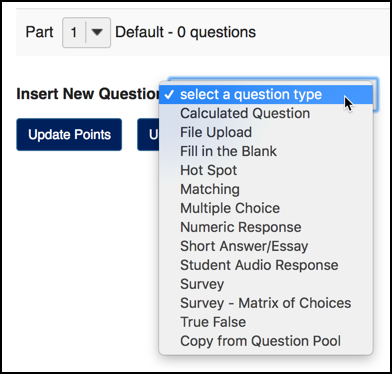
- Next to the "Add Question" banner, select the type of question you would like to use from the drop-down list. Note: If you'd like to learn more,
check out our detailed guide about question types.
- Complete the "Edit Question" form. Each page will vary based on the question type and options. For this example,
we'll use "Multiple Choice" and "Single Correct."
- Enter the "Answer Point Value" for the question (e.g. 2).
- (Optional) Input a "Minimum Point Value" for the question (e.g. 0.5). This will award the inputted point value if a student at least attempts to answer the question.
- Is the question extra credit? If so, select the checkbox for "Extra Credit" to mark it as such.
- Enter the "Question Text." For example: "What color is the sky on a cloudless day at the equator?"
- Enter answer values in each box. To remove one of the option boxes, click the respective "Remove" link. To add additional choice boxes, use the "Insert Additional Answers" drop-down list and select the desired number.
- Select the "Correct Answer" radio button next to the correct answer.
- (Optional) Select whether to "Randomize Answers." We recommend this to display a different order of answers to each student.
- (Optional) Enter any optional feedback to offer automated guidance to the student after the assessment feedback has been released.
- Click "Save" when finished.
- Continue to add questions to your exam. Note: you can leave and come back to your assessment draft at any time.
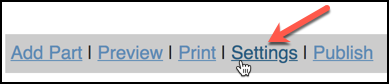
- When you have finished adding questions, select "Settings." Note: If you'd like to learn more, please see our detailed guides and notes on
assessment settings.
- Within the "Availability and Submissions" heading, be sure to establish the following:
- Submissions: Set the number of submissions allowed (e.g. 1).
- Delivery Dates: Set the "available" and "due" dates. Will you allow late submissions to be accepted? If "yes," then adjust the "until" date/time accordingly.
- Timed Assessment: Decide whether there is a time limit on the assessment. This is a fixed time and once the student begins the exam, the clock starts. To specify a time limit, click the "and has a time limit of" checkbox and then specify the hours and minutes. Tip: For timed assessments, we recommend allowing late submissions to be accepted. This way, a student that begins the assessment five minutes before the deadline will have a chance to complete the entire assessment without an error.
- Within the "Grading and Feedback" heading, make note of the following items:
- Decide on whether to send grades to the Gradebook tool.
- Decide on feedback authoring (question-level, selection-level, or both). If you modify this option, you should return to edit the assessment and modify your feedback for each question accordingly.
- Decide on feedback delivery (this is critical!). We recommend "Feedback will be displayed to the student on specific dates" and set a date a few days after the deadline so you have time to offer make-up exams to students who are absent due to illness or other excuses. Never select "Feedback during exam" unless you are creating a practice exam and want students to see answers during the exam.
- Decide on what feedback will be shared with your students. We recommend selecting all options except statistics and histograms.
- Within the "Layout and Appearance" heading, we generally recommend:
- Flexible access to questions with "Next", "Previous", and a "Table of Contents" buttons
- Each Question is on a separate Web page, and
- Continuous numbering between parts.
- Select "Save Settings and Publish" to proceed to the final step.
- The final confirmation page will display. Confirm that you are ready to release and
publish the test.
- Choose whether you will send a notification to students (or not) with the notification drop-down menu.
- Select the final "Publish" button to complete the process.
- NOTE: Once students begin the assessment you will not be able to edit questions or point values.
See Also:
- Faculty Training Session | Tests & Quizzes Tool
- Webinar: Go Green! Create Online Tests and Quizzes in Courses
- Webinar: Individualizing Online Exams with the Tests & Quizzes tool
- Settings - learn more about the settings in Tests & Quizzes
- Question Types - explore more about different question types in Tests & Quizzes
- Add audio-based questions in exams with Tests & Quizzes
- Handout: Top Faculty Gotchas to Avoid