Courses: Wiki Tool

Overview
Learn how instructors can use the Wiki Tool within Courses (powered by Sakai).
What Does It Do?
The tool allows you to create web pages within your course site, without needing any advanced web page authoring skills.
How You Can Use It:
- Use the space as a collaborative knowledge-building exercise in which students create a collection of resources about certain topics or ideas
- Use as a staging ground for student groups to draft research proposals
- Publish your lecture notes
- Use the space to offer other course guidance
Instructions
- Edit the Wiki Home Page
- Add a Heading
- Add a new Sub Page
- Revert back to previous version of your Wiki
- Watch your Wiki for Changes and Updates
Edit the Wiki Home Page
- Click the tab for your course or project site.
-
Click the Wiki tool in the left menu. If the Wiki tool is not listed, add it by Site Info > Edit Tools.
- Optional: Read the default home page of the Wiki tool to get a better idea of how to utilize it for your course.
- Click "Edit" at the top of the Wiki tool home page.
- Remove the default content on the Wiki home page:
- Place your cursor in the text editor
- Press CTRL + A (CMD + A on a Mac) to select all
- Press the Delete key
- Type content into the editor. Tip: Be sure to save your work often.
- Click "Save" at the bottom of the page.
Add a Heading
- Click "Edit" at the top of the Wiki tool home page.
- Place your cursor in the editor at the desired location for the heading.
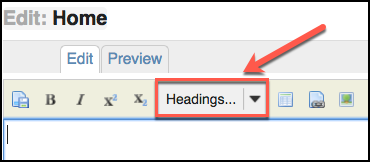
- Click the "Headings..." dropdown in the editor and select an appropriate heading level.

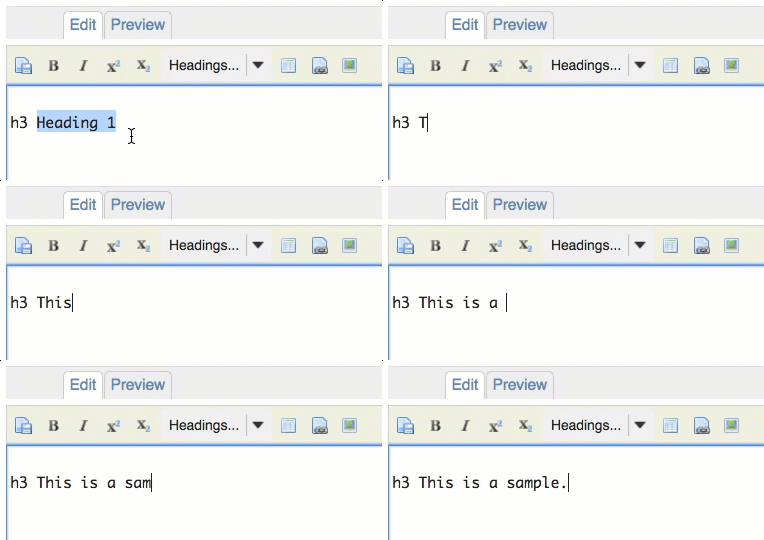
- An "h#" tag (with # corresponding to the level you selected) will display in the editor.
- Type in a heading to replace the highlighted "Heading 1" default text.

- Click "Save" at the bottom of the page.
Add a New Sub-Page
- Click "Edit" at the top of the Wiki tool home page.
- Place your cursor in the editor at the desired location for the new sub page.
- Between square brackets [ ... ], type in the name of the new page you want to create.
For example:
- [This is a Sample Page]
- [Example]
- Click "Save" at the bottom of the page. Note: You can access the sub page at any time by clicking the link and then clicking the "Edit" button at the top of the Wiki page.
Revert to a Previous Version of your Wiki
- Click the Wiki tool in the left menu.
- Click the "History" tab at the top of the Wiki page.
- (Optional) Compare an older version of the Wiki to the "Current" version for better clarity. On a given version row, select "Current" under the "Compare to?" column.
- Otherwise, select a version you would like to preview under the "Version?" column.
- Review the version.
- Click the "History" tab at the top of the Wiki page.
- You may select to "Revert to this version" or click to preview another version (step #3).
Watch your Wiki for Changes and Updates
- Click the Wiki tool in the left menu.
- Click the "Watch" tab at the top of the Wiki page.
- From here, you can specify how you would like to be notified (if at all) of any changes to the Wiki.
- Click "Save."
See Also
← Back to Faculty Guides for Courses