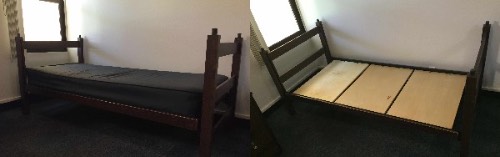
Bed Raising Dark Wood
The "dark wood" beds pictured below are found in the following areas:
- First-Year Houses
- Seaside Residence Hall
- Rockwell Towers
- Lovernich Apartments
- George Page I Apartments
- Drescher Apartments
These beds have multiple height settings which will allow the following levels of clearance space beneath the bed: 8", 11", 14", 17", 20", 23", 26", 29", 32".
TIPS: This process requires a Rubber Mallet and is best carried out in pairs. Please come to the Housing Office or connect with your RA to check out a mallet.
At its fastest, this process will take about 5 to 10 minutes to complete.
1. First, remove the mattress from the bed. DO NOT remove the three support planks.
If any piece of the bed is missing, please contact the Housing and Residence Life Office.
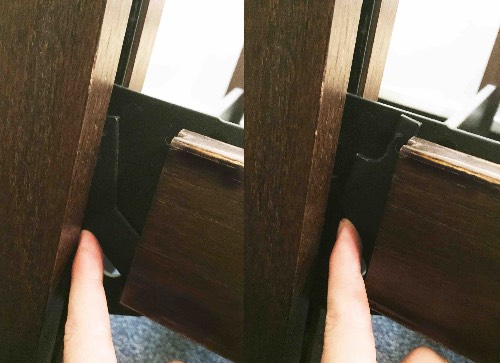
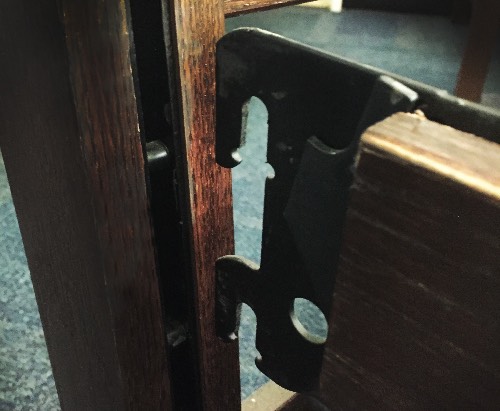
2. Some of our dark wood beds have a safety latch on all four corners (see below).
If your bed has a safety latch, slide the latch away from the bed frame before removing the rails.
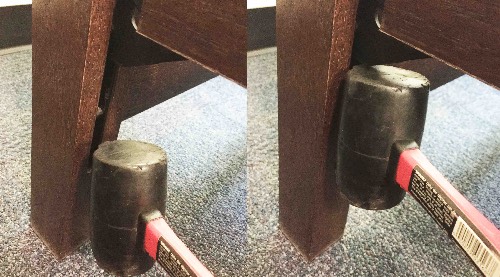
3. Use the rubber mallet to loosen the railing latches from the bed posts.
Be careful to use the mallet on metal parts of the railing.
Using the mallet on the wood may damage the bed.
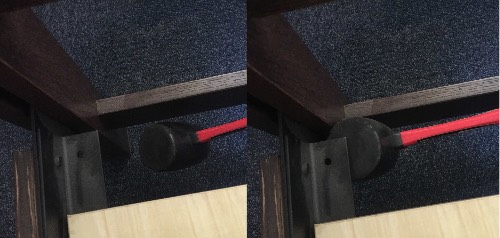
4. Once loosened, lift the railings from the bedposts and move them to the desired height.
Be sure that all four railings are adjusted to the same height setting.
5. Once the bed is in place, re-latch the safety supports on all four corners (if applicable).
6. Replace the mattress.
7. You're done!
Lofting the Bed
If a student desires to lift the bed higher than its tallest railing, a limited number of lofting kits are available upon request. Kits include a safety guardrail, a stabilizer bar, and two bed ends.
A lofting kit allows students to place other room furniture underneath the lofted bed to allow more room space. Lofting kits are limited in availability, and can be requested via the Housing Office.
Bunk Beds
Bunking beds in a double room is placing one bed on top of the other. Each bed end has 2 knobs which allows for this to occur. Students wishing to bunk their bed are required to reach out to the Housing Office to request a safety guardrail.
For students who desire to bunk or loft their bed, a safety guardrail is required. Please contact the Housing and Residence Life Office for more information.
Please contact the Housing and Residence Life Office, your RA, or your RD if you should run into any issues. We are willing, ready, and able to help.