Using the Lessons Tool in Courses
What Does It Do?
The Lessons tool allows you to bring together the tools and resources of your course site into a single, streamlined, learning space. This tool tends to be commonly used by instructors in hybrid or fully online courses, as well as, those instructors who simply wish to structure the flow, availability, and deliverables of their objectives.
How You Can Use It
- Structure your course site with weekly content and deliverables
- Prevent students from wandering ahead by leveraging required tasks and/or time-release settings
- Link Assignments, Assessments, Announcements, and other tools together in a streamlined, learning interface for students
Design Instructions
- Add a Subpage
- Add Simple Text
- Embed a Video, Image, or Existing Resource
- Add a Checklist
- Add a Question
- Link to an Assignment, Test or Quiz, or a Forum or Topic
- Reorder your Page Items
- Add Personalization to Your Page(s)
Settings Instructions
Add a Subpage
While adding subpages themselves is relatively easy, thinking about the overall structure the subpages will take is not. Be sure you have spent some time thinking about the overall structure of your lessons prior to creating subpages.
- Go to your class site by selecting the tab for your course or project site in your Favorites Bar, or select the "Sites" menu at the top right, and choose the desired course.
- Select the "Lessons" tool in the left tool menu. If the Lessons tool is not listed, add it by navigating
to Site Info > Manage Tools.

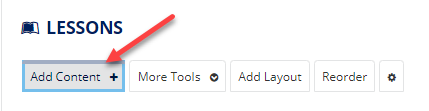
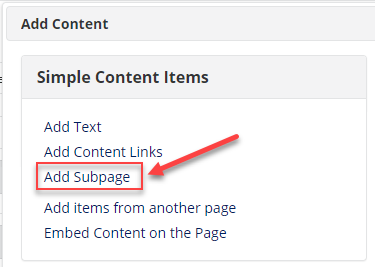
- Select the "Add Content" tab at the top of the Lessons tool and then select "Add Subpage."
- Enter a Page title (e.g. "Week 01").
- (Optional) If you wish this new subpage to refer to an already existing page, then click "Choose Existing Page." Note: you will next be prompted to select that existing page. This will simply link to an existing page, not duplicate it.
- Determine the following:
- Will this subpage be the next page in a flow or sequence? (This is critical! Be sure to have a thoughtful plan or strategy in mind).

- If so, select the "Next page" checkbox.
- If you would simply like this subpage to exist as a child of the current page, then leave this checkbox blank.
- Would you like this subpage to appear as a button rather than a simple link? If so, select the "Show as button rather than link" checkbox.
- Will this subpage be the next page in a flow or sequence? (This is critical! Be sure to have a thoughtful plan or strategy in mind).
- Select "Create."
- The new subpage will open in the "content creator" interface. Important notes:
- Navigating between Pages:
- If you created a "Next page," then you'll always be able to navigate backwards by clicking the "Back" button at the bottom left of your new subpage.
- If you created a "Child page," then you'll be able to navigate by clicking the appropriate page link in the breadcrumbs at the top left of the new subpage.
- Configuring your Pages:
- You can always return to the home page to reconfigure or delete your subpage. Simply
click the corresponding options to the right of the subpage.

- You can always return to the home page to reconfigure or delete your subpage. Simply
click the corresponding options to the right of the subpage.
- Navigating between Pages:
Add Simple Text
Adding text ought to coincide with the addition of other elements to your page. As such, the text item typically makes a good "header" or "ender" to a page's content.
- In your class site, select the "Lessons" tool in the tool menu. If the Lessons tool is not listed, add it by navigating to
Site Info > Manage Tools.
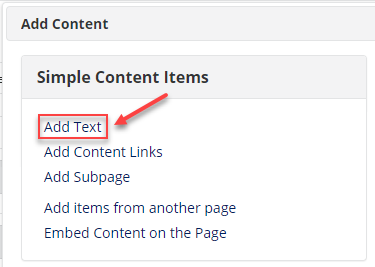
- Select the "Add Content" tab at the top of the Lessons tool, and then select "Add Text."
- Next, enter and format your text, add links, insert inline images, etc. with the rich
text editor tool.
- Tip: Use the "Templates" button in the editor menu to apply quick snippets of designed code.
- (Optional) Does your lessons page contain any prerequisites? If so, you can opt not to release this particular content item until all prerequisites have been completed.
- When done, select "Save."
Embed a Video, Image, or Existing Resource
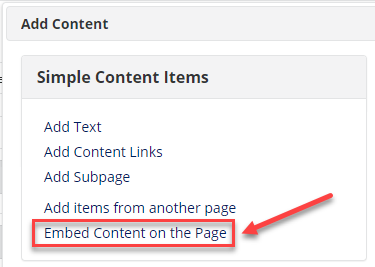
- Select the "Add Content" tab at the top of the Lessons tool and then select the "Embed content on page" option.
- On the resulting page, if you would like to embed a(n) ...
- Image:
- Select "Choose Files."
- Locate the image file (.jpg, .png, .bmp) on your computer and then select "Open."
- Video:
- Copy the URL or embed code of the desired video (e.g. "https://youtu.be/ua7yyLOvhn8") from the source. Tip: YouTube is a powerful source for instructional content.
- Paste the URL or embed code into the corresponding field.
- (Optional) Enter a user-friendly name into the "Custom Name" field. This would be used as the link name for a video platform not recognized by the system. Common systems, like YouTube and Vimeo, will simply display the embedded video in the video player instead.
- Existing files from Resources:
- Select the " Select existing files from Resources" link.
- Locate the content item in your course site Resources folder and then choose the "Select" link adjacent to the item.
- Choose "Continue."
- Image:
- (Optional) Does your lessons page contain any prerequisites? If so, you can opt not to release this particular content item until all prerequisites have been completed.
- Select "Save."
Add a Checklist
Checklists are useful in keeping students engaged in the Lessons tool. It not only provides an interactive element to your lessons, it allows students to keep track of their own progress.
- Click the "Add Content +" tab at the top of the Lessons tool and then click the "Add Checklist" option.
- On the resulting page, type in a Checklist Title for your checklist.
- (Optional) Specify a description for your Checklist. Tip: This space can be useful to describe the context/purpose of the checklist.
- Click the "Add New Checklist Item" button to start adding items. Note: you can add additional checklist items by incrementally clicking the "Add New Checklist Item" as needed.
- (Optional) Modify the appearance of your checklist by changing the indent level or providing a Custom CSS class.
- (Optional) If you have created groups for your course, then select specific groups for which this checklist should be shown. Note: if no groups are selected, the checklist will display to all students.
- Click "Save."
Add a Question
Asking questions in the Lessons tool provides a way to check for understanding and to keep students engaged with your content. Follow the instructions below to create a question.
- Click the "Add Content +" tab at the top of the Lessons tool and then select the "Add question" option.
- Select whether you would like to ask a "Multiple Choice" or "Short Answer" question. Note: Only multiple choice questions provide the option to show students a graph of how other students responded after the question is answered.
- Type in the question in the "Question Text" box.
- Specify the possible answers by toggling the "Add New Answer" button.
- If a multiple choice question, be sure to check the box next to the correct answer.
- (Optional) If you are adding a multiple choice question, you can opt to show your students a graph of how others responded after they answer the question.
- (Optional) Would you like to grade this question? If so, check the box next to "Grade this question" and then specify both the corresponding title for the item in the Gradebook and the maximum possible points.
- (Optional) If you would like to provide feedback if the student answers the question
correctly (e.g. "Well done!"), type it into the corresponding box.
- (Optional) If you would like to provide feedback if the student answers the question incorrectly (e.g. "Incorrect. The answer is ..."), type it into the corresponding box.
- (Optional) Would you like your students to complete certain items or tasks before
they have the ability to answer this question?
- If so, be sure to view the instructions below on managing prerequisites.
- (Optional) Would you like to require this item for students to complete?
- If so, be sure to view the instructions below on requiring items.
- (Optional) If you would like to make this question available to specific groups only,
click the "Select groups for which this item should be shown" link.
- Then select the group or groups for which this question will be displayed
- Click "Save."
Link to an Assignment, Test or Quiz, or a Forum or Topic
- Linking to an assignment, assessment, or forum requires that it be created in its corresponding tool first. Be sure that the corresponding item exists and then move on to the next step.
- Click the Lessons tool.
- Click the "Add Content +" tab at the top of the Lessons tool, where you will have
the option to choose the following:
- Assignment
- Click "Link to an assignment."
- Select the appropriate assignment from the list.
- Click the "Use selected item."
- Assessment
- Click "Link to a test or quiz."
- Select the appropriate assessment from the list. Important Note: an assessment must be published before it will appear as a selectable option in this list.
- Click the "Use selected item."
- Forum or Topic
- Click "Link to a forum or topic."
- Select the appropriate forum or its corresponding child topic from the list. Note: if the forum or topic has been hidden due to the current availability settings, then be mindful that students will be able to see and click this link, but will not be able to participate on the forum or topic until the availability settings open.
- Click the "Use selected item."
- Assignment
- The corresponding item will populate at the bottom of the page.
- Tip: consider making this item you just linked a required item.
Reorder your Page Items
- In the Lessons tool, click the "Reorder" tab at the top of the tool.
- Click and drag any item to its new order placement. Note: you also have the option to delete a page item by clicking the red "X" adjacent to each corresponding item.
- (Optional) You can also "Add items from another page" by clicking the corresponding link and selecting a page item currently residing on another sub page.
- Click "Save."
Add Personalization to your Page(s)
Personalization in the Lessons tool entails addressing students by name. For example, on a welcome page designed to introduce the course objectives, instructors can type something like "Welcome, {{firstname}}!" When a student views this page, he or she will see his or her own first name populate. Adding some personalization is a quick and painless process.
- In the Lessons tool, either:
- Click the "Add Content +" button and select the "Add Text" option, or
- Click the "Edit" icon on the desired text box to modify an existing text element
- Place your cursor into the desired place in the editor and type in the desired code.
Instructors may utilize the following codes:
- {{firstname}}
- This code will pull the observer's first name.
- {{lastname}}
- This code will pull the observer's last name.
- {{fullname}}
- This code will pull the observer's full name.
- {{firstname}}
- Click "Save" when finished. Note: Instructors will see their own names populate.
This is normal and it confirms that the personalization is working properly! Students
will see their own names populate when they have logged into Courses and are viewing
your page.

Hiding Pages
In the Lessons tool, there are two (2) methods to hide pages. Tip: It is strongly recommended that you check your course site pages under a student test account after you have calibrated any "hide" settings. This way, you can be certain that you accomplished what you set out to do.
Method 1
- In the Lessons tool, locate the page item you wish to hide and click its corresponding
"Edit" icon.

- Click the "Hide page until the following date ..." checkbox.
- Click the Calendar icon next to the date and time field.
- Specify the date and time until which you would like the page to be hidden (this will be the date and time that the page will show).
- Click "Update Item" at the bottom.
Method 2
- In the Lessons tool, drill down into the page item you wish to hide and click the
"Gear" icon.

- From here, you can select the checkbox for either of two options:
- Date release page on the following date: This will hide the page until the date and time you specify.
- Hide this page from users: This will hide the page indefinitely, until you return to uncheck this box.
- Click "Save" at the bottom.
Require an Item
Requiring items in the Lessons tool adds to the structure and flow of your content. It may be desirable to require students to complete a task prior to moving forward to the next task or topic. As such, requiring an item will most likely coincide with the need to mark an item as a prerequisite. First, however, follow the instructions below to require an item.
- In the Lessons tool, navigate to the specific item to be required (i.e. an assignment,
test or quiz, forum topic, etc.)
- Note: if you need guidance on how to link an assignment, test or quiz, or forum topic inside the Lessons tool, please see the instructions above.
- Click the "Edit" icon corresponding to the item. Note: the image below is just an
example. You may wish to require an assignment or other item.

- Select the checkbox next to "Require that the student submit this [item]" Note: This can be found in the "Prerequisites & Requirements" area.
- Click "Update Item."
- A black star icon will be placed next to the item, reflecting that it is a required
item.

Managing Prerequisite Items
In the Lessons tool, any item marked as having prerequisites must have a required item before it. As such, you will want to be sure to first set a required item (see immediately above) before it can be the prerequisite for a subsequent task. Required items and their prerequisites "stack" upon each other to produce the flow of one item to the next. So, you will want to give some thought to the flow of your required tasks and deliverables.
For example, you may want to require students to complete a quiz before they can begin to tackle an assignment. The instructions below will demonstrate this scenario and will continue off of the "Require an Item" instructions (above).
- In the Lessons tool, navigate to the page or sub page containing the required item and add a link.
- Click the "Edit" icon adjacent to the new assignment item you just added.

- Click the "Don't Release Item Until All Prerequisites are Completed" checkbox.
- (Optional) You may mark this item as a required item as well if you wish (so that, it too, can be a prerequisite for a third, later item).
- Click "Update Item."
- The item will now show that it "Has prerequisites" and will be greyed out to reflect
this new status.

See Also