How to Embed Content in the Lessons Tool
What Does It Do?
The Lessons tool allows you to embed videos, pictures, presentations, and other web content directly into Courses. This can be helpful in creating more streamlined learning modules within Courses and can give your students easier access to class material by not sending them to external links or sources.
How You Can Use It
- Embed YouTube videos, Google Suite documents, or other common file types (e.g. PDF, PowerPoint)
- Include visual aids with your course material
- Create more visually appealing learning modules
Instructions:
- Select your course or project site.
- Click "Lessons" in the left toolbar. Note: If the Lessons tool is not present in your toolbar, please add it through Site Info > Manage Tools.
- Click "Add Content +" and then select "Embed content on page."

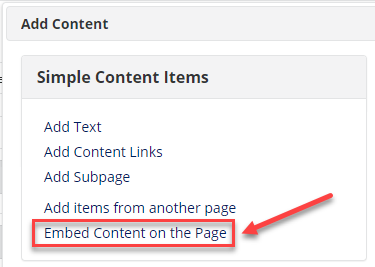
- Choose one of the following options:
- Select a file directly from your computer (ideal for PDF documents or images)
- Select existing files from the Resources folder on your class site
- Enter the embed code under section "Or add a URL or embed code"
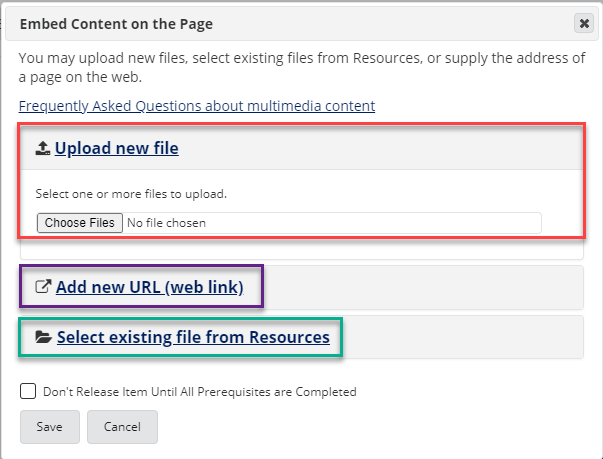
- Click "Save."
Locating Embed Codes
YouTube
- Navigate to the YouTube video that you would like to embed.
- Click "Share."
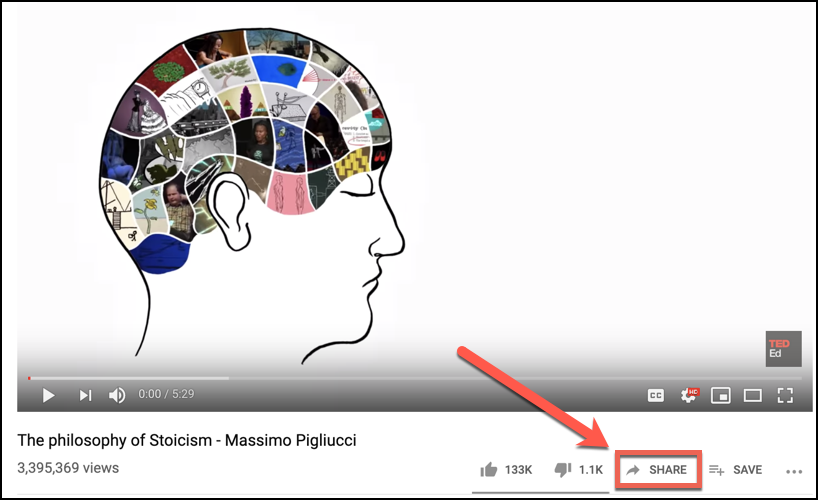
- Select the "< > Embed" option.
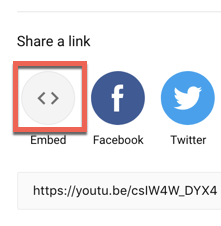
- Copy the embed code.
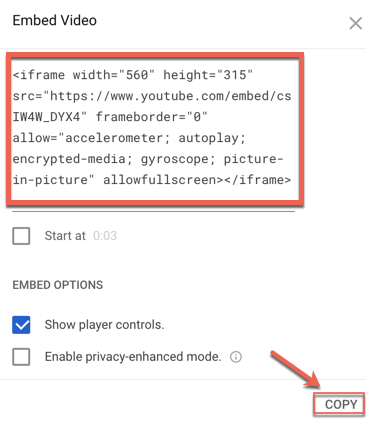
- Paste the code onto the corresponding Lessons page in Courses.
Google Docs, Sheets, and Slides
- Open the Google Doc, Sheet, or Slides presentation that you would like to embed.
- Click the File tab in the upper left and select "Publish to the web."

- Click "Embed," select "require viewers to sign in with their Pepperdine University
account," and click "Publish."

- Copy the embed code.
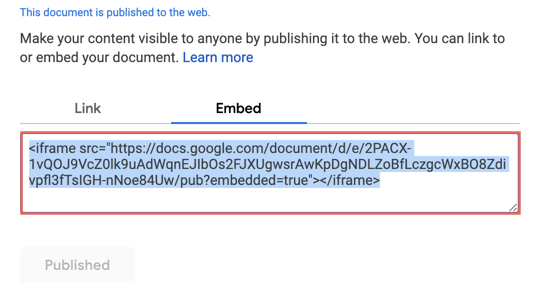
- Paste the code onto the corresponding Lessons page in Courses.
Google Forms
- Open the Google Form that you would like to embed.
- Click "Send," select the "< >" (embed) icon, and then copy the corresponding embed HTML code.
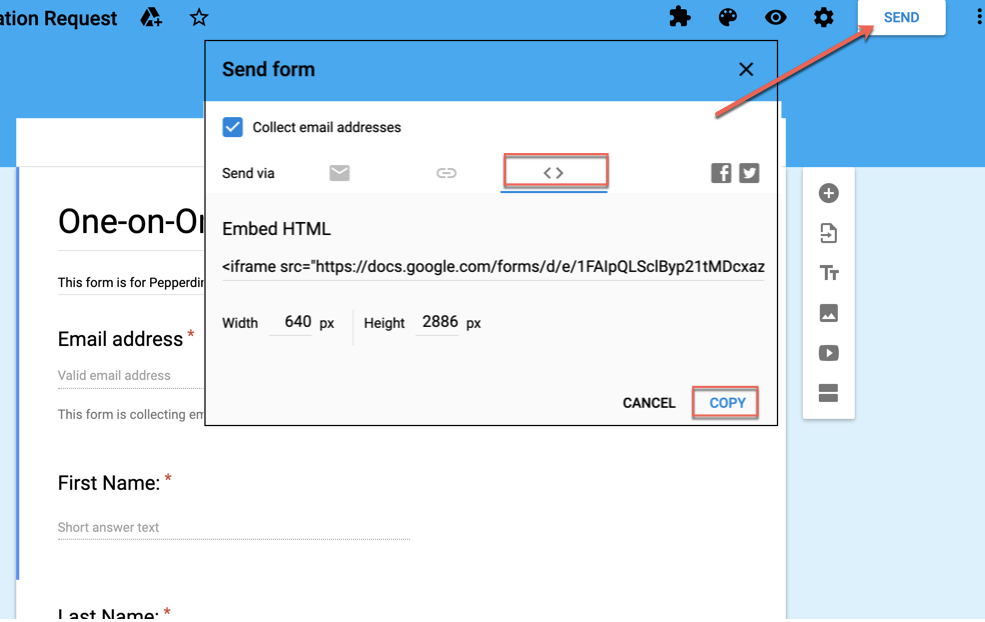
- Paste the code onto the corresponding Lessons page in Courses.