Gallery Asset and Widget
Description
Assets allow for the creation and use of reusable content such as text, images, media, code blocks, managed forms, image galleries, polls, and more. The creation and management of assets is integrated into the permission system and administrators can restrict the editing of assets through group access.
The gallery asset and widget are used together to create slideshows, photo galleries, and single and standard carousels.
Slideshows display images with optional accompanying titles, captions, and/or links layered over the image. It is best to keep titles and captions as brief as possible to focus on the impact of the images. There are options to auto-play the slideshow and each slideshow is touch compatible with swiping gestures and non-touch devices have previous/next and play/pause buttons.
Single and standard carousels display images with accompanying titles, captions, and/or links. A single carousel shows one item at a time and contains previous and next buttons. A standard carousel shows up to three items at a time along with previous and next buttons for more content. Users manually scroll or swipe through the items.
Recommended Sizes
- Full: 1120 x 525 pixels (for one-column layout)
- Full: 886 x 415 pixels (for two-column layout)
- Two-thirds: 740 x 370 pixels
- Half: 550 x 355 pixels
Note: All images within a slideshow or carousel need to be sized the same; any differences can cause the feature to shift.
Please Note: You must enter Titles in the "Title" fields of the Gallery for Web Accessibility.
Gallery Widget Samples
Slideshow


Carousel - Standard
09/30/2021

09/30/2021

09/24/2021
09/24/2021
Carousel - Single
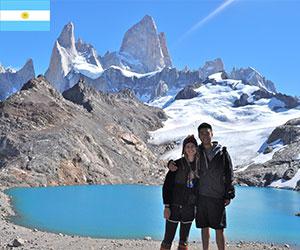
Live with Argentine families and get immersed in Latin culture. Do you know how to Tango? This is where it all started.
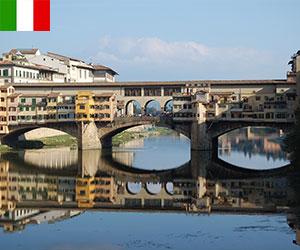
Step outside the Pepperdine house, turn left, and go see Michelangelo's David. Where's the best food in the world? Italy of course!
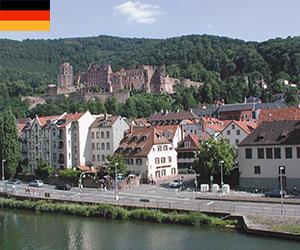
Live in a beautiful mansion, right down the street from a castle. What German city did Mark Twain fall in love with? You guessed it!
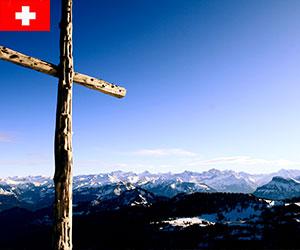
Each morning you'll wake up, open your window, and there are the Alps. Where's the best place for outdoor sports? Ask the Swiss.

Seconds from Hyde Park, minutes to Piccadilly Circus, Pepperdine is right downtown. Where's great theatre? No doubt, London!
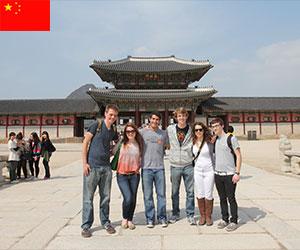
From Ming to Mao to Modern, this city has it all! What country must you know about, more than any other? The world's biggest – China!

Where can you be minutes from the Nation's great monuments, international organizations, and government officials? You guessed it, Washington D.C.!

Students have the opportunity to study abroad and intern at our international facilities and in other specialized locations.