How to Create a Requisition
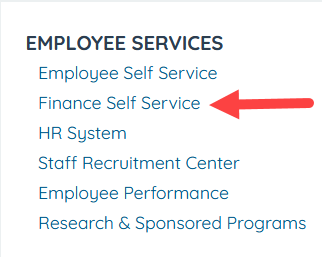
- Click Finance Self Service
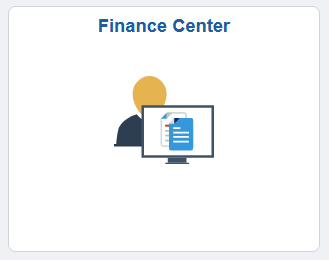
- Click the Finance Center Tile
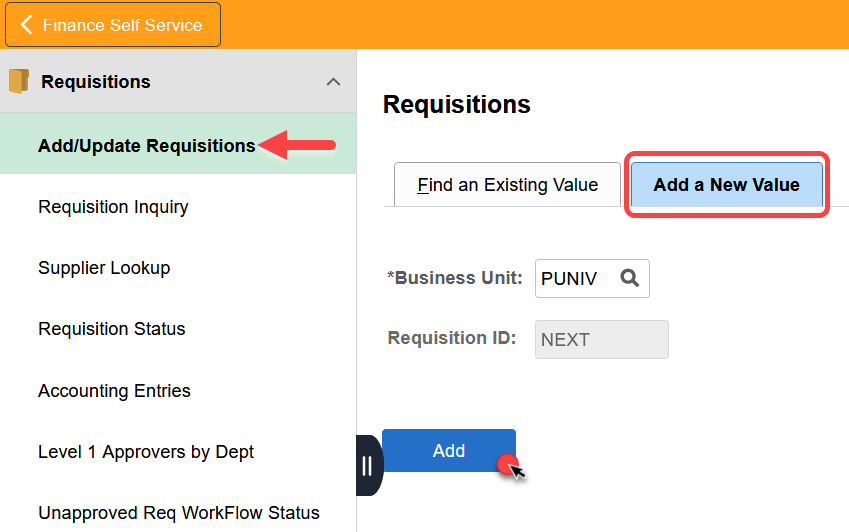
- Click on Add/Update Requisitions
- Click on Add a New Value tab then enter the Business Unit
- Click ADD
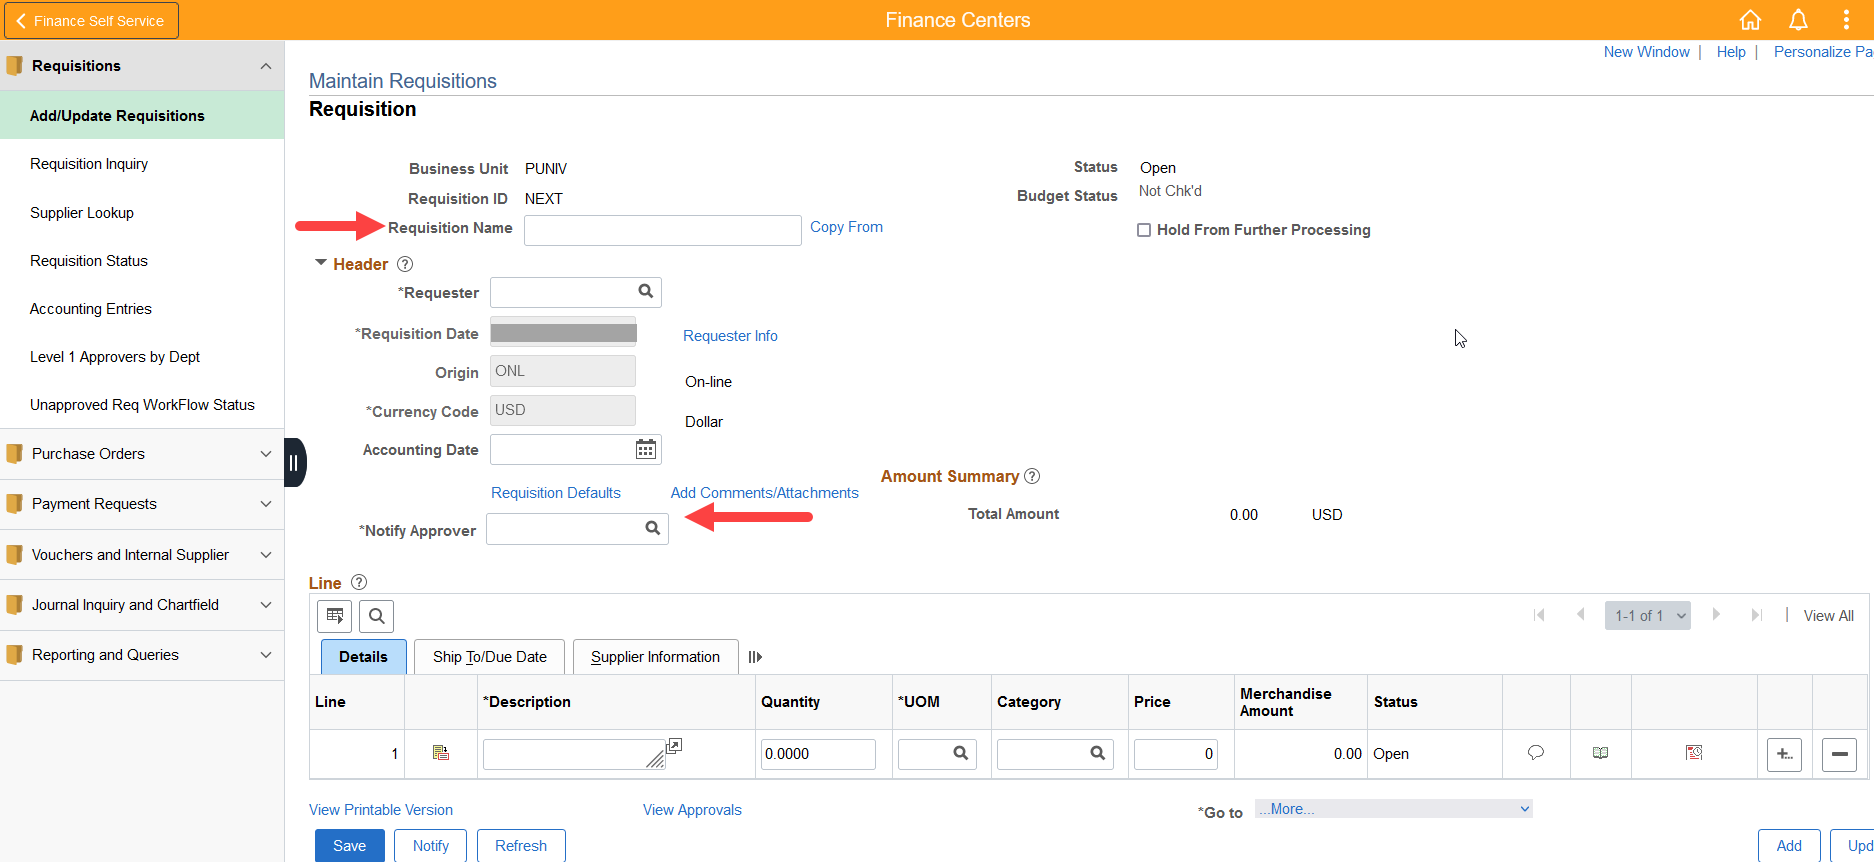
Creating a Requisition
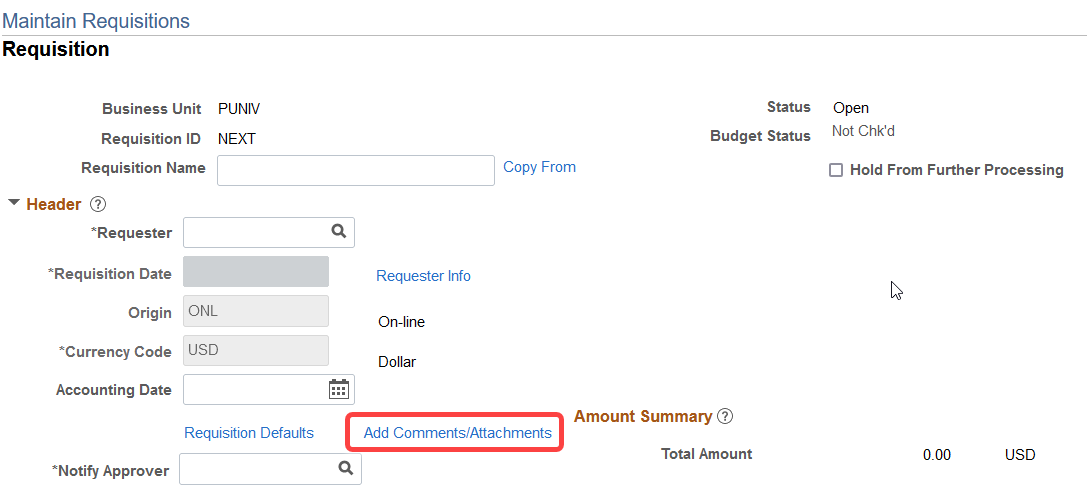
- Enter a Requisition Name – We recommend entering the Supplier name here
- Enter the Approver – Use the Lookup to find your Approver
Add Attachment
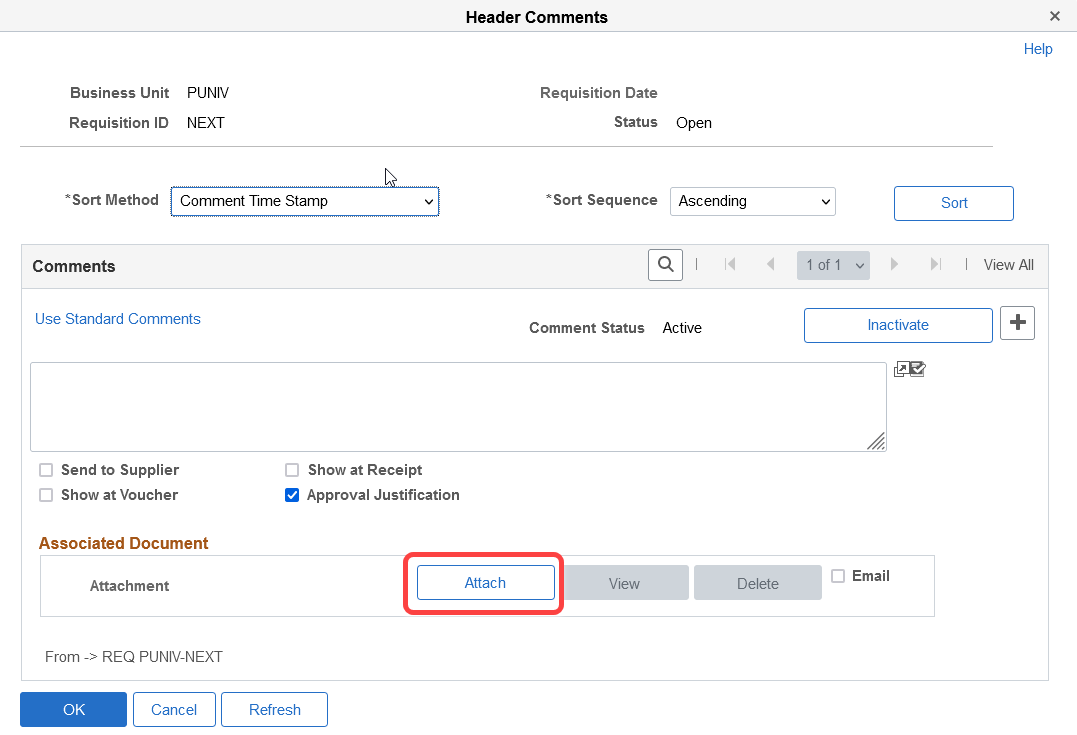
- Click the link Add Comments/Attachments – Attach a quote or supporting document
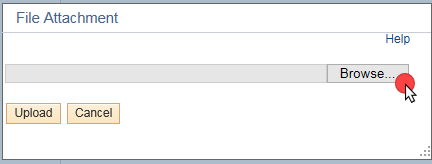
- Select the Attach button to open the File Attachment navigation view
- Select Browse-locate the attachment and choose file (PDF only)-click Open-select Upload
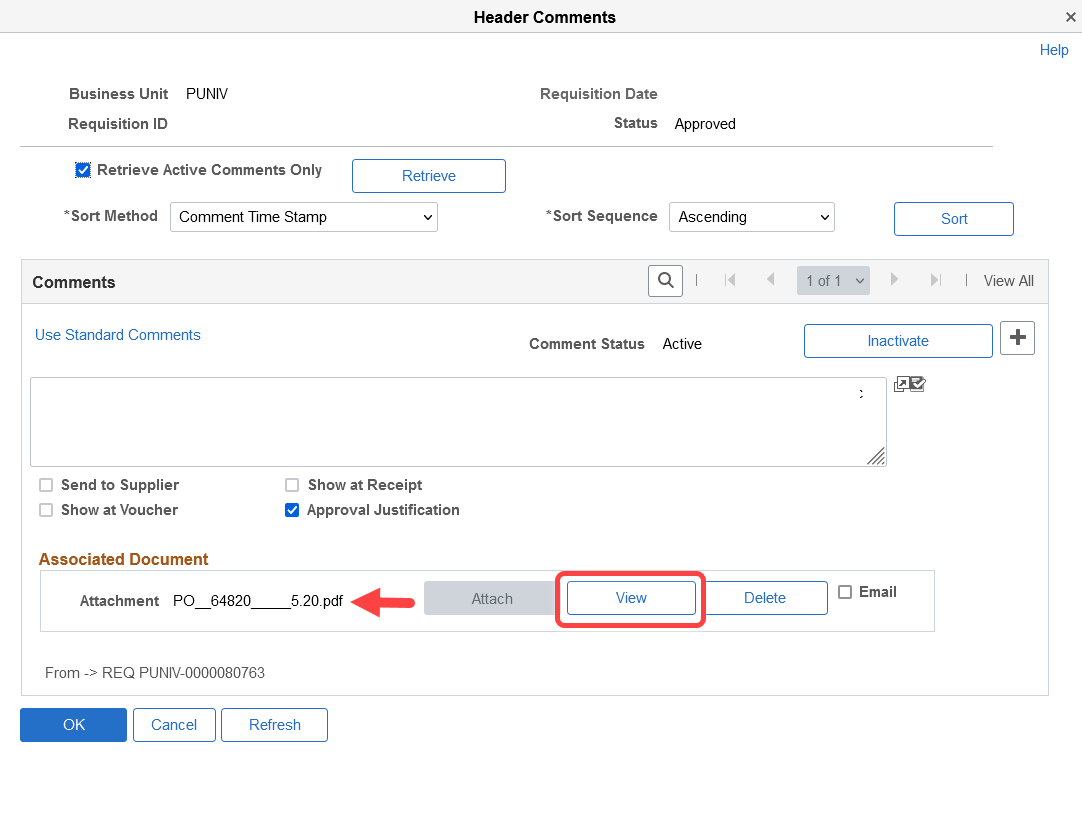
- Use the View button to confirm the file is uploaded
- Select OK
 Enter the Line Detai
- Enter the Description (details describing the Business purpose)
- The arrow icon will display in a modal (pop-out) window
- Enter the Quantity
- Enter the UOM (Unit of Measure)**
- Enter the Category**
- Enter the Price per item
TIP: Select the icon Show all columns to expand the Line details to include Ship To/Due Date & Supplier Information
** Use the Lookup
Continue the Line Details
- Enter the Due Date (Goods or Services are expected to arrive/occur)
- The Ship To location is defaulted to MAL-MAIN
Note: The location can be changed in Defaults - Enter the Supplier. Use the Lookup icon to assist
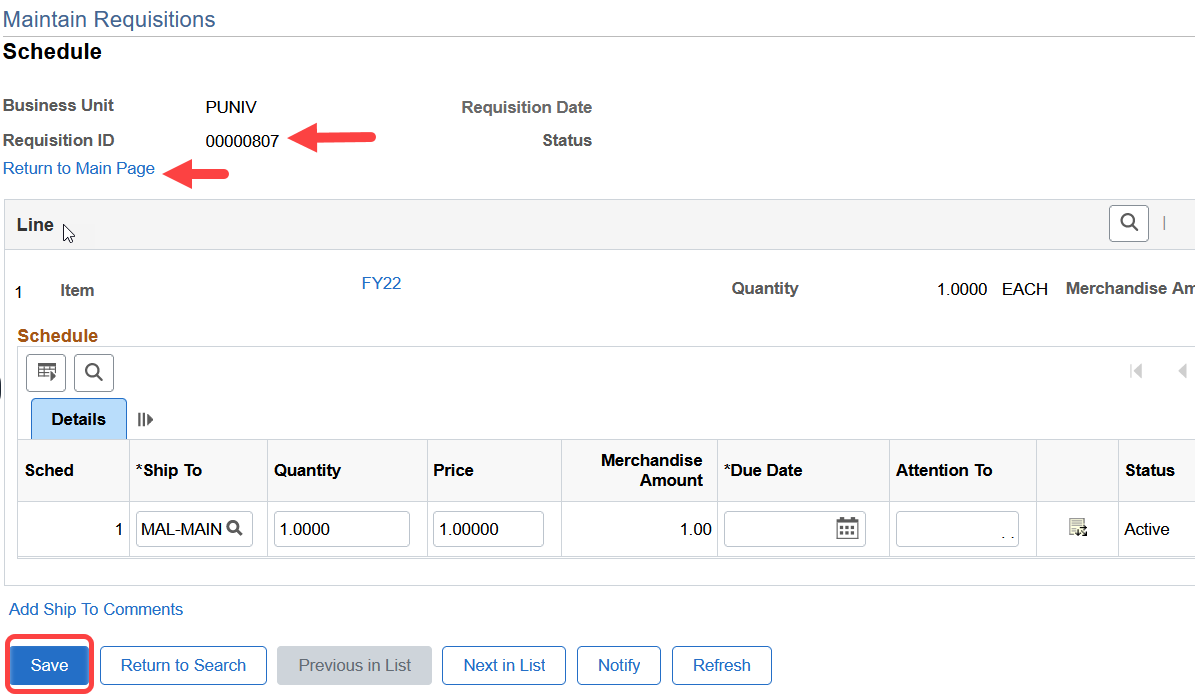
- Use the Schedule icon to open the Schedule (needed to access the Chartfields)
TIP: Use the PLUS icon to add a row
Continue to the Line Details
- The OpenInvoice Approver defaults to the Requester
- This field can be changed to another individual authorized to approve in OpenInvoice
- Click on the Chartfields icon to open the Distribution
- Enter your chartfields/chartstring and click OK to continue

Completing the Requisition
- Return to Main Page
- Select the Save button
- Requisition ID will change from NEXT to an ID number once saved
- Example: 0000061222
Note: The Requisition cannot be saved until all required entries are populated
Budget Check
- Click the Budget Check icon (Before the Requisition can be submitted for approval a budget check must be completed)
Budget Status Valid = Successful completion
Submit For Approval
- Click the Submit for Approval icon, once the Budget Check is Valid and the Status is Open
- The Status changes to Pending
- The approver will now see the Requisition in their workflow
Note: The approver will receive an email notification

Last Updated: 11/22/2021