How to Merge Files into One PDF
To learn the receipt organization process, you can either watch the video below or click here for the step-by-step tutorial.
Receipt Organization Tutorial
No matter the format of your receipt, whether it be attached in an email or scanned in by your office scanner as a PDF, you will need to use a separate application to merge these multiple files into a single PDF. The application we use is Adobe Acrobat Pro 2017. This application features a new thumbnail preview that allows you to look at the files before you bring them together and to arrange files by simply dragging and dropping files into any particular order. Here is how to organize your receipts in order and create single PDF file. The Pepperdine Finance office requires the receipts to be in corresponding order with the transactions from your monthly statement.
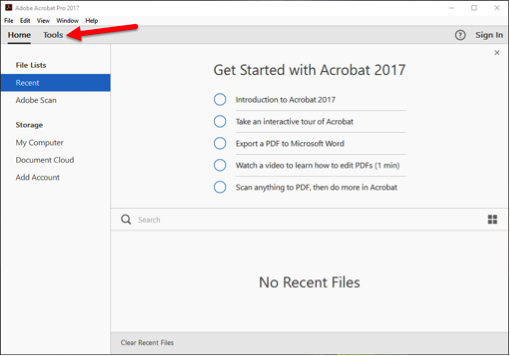
- Open Adobe Acrobat Pro 2017. From the Home view select Tools
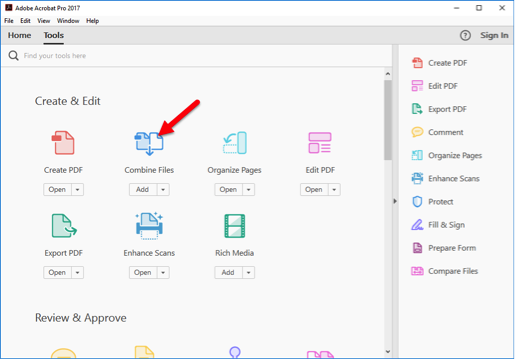
- then click on Combine Files.
- The Combine Files interface is displayed with the toolbar at the top.
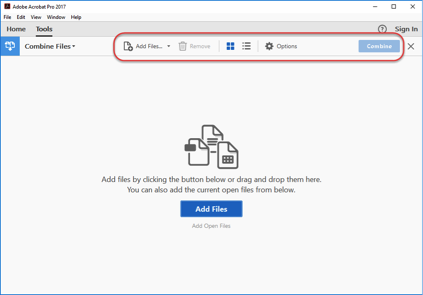
- The toolbar icon choices are: Add Files; Remove Selected Items; Thumbnail View; List View; Options (that select
a file size); the Combine button and the X closes that view.

- Besides the default Add files selection you may Drag files and drop them from your
file system directly into the Combine Files interface.

- The interface provides the ability to add a folder of files, a web page, any currently
open files, items in the clipboard, pages from a scanner, or a file you combined previously.
Note that the Add Email function is not compatible with Google mail.
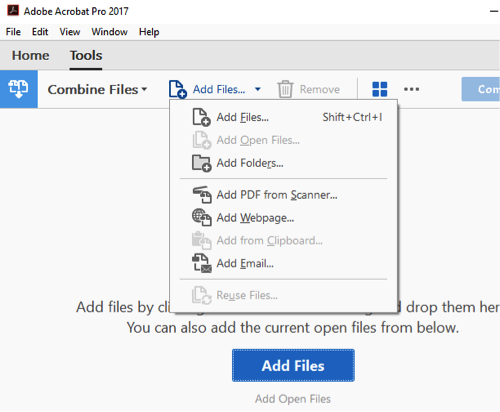
- To use the Add files to combine....
1. Select Add Files and navigate to the location of the files you wish to add.
2. Select one or more files to add.
3. Click the Windows Open button.
You can repeat these steps as many times as necessary to include all of the content you'd like to combine into your final PDF.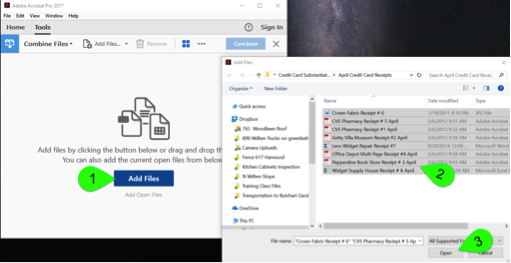
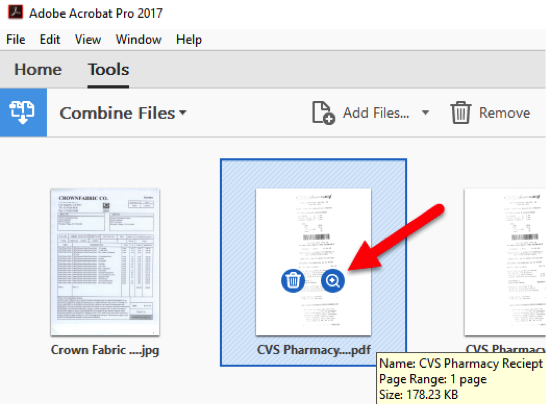
- Once you add files, you can hover your mouse over one of the thumbnails and click
the magnifying glass to see an enlarged preview.
Click outside of that preview to close it.Note the trash can icon removes that file from the files to be combined.
-
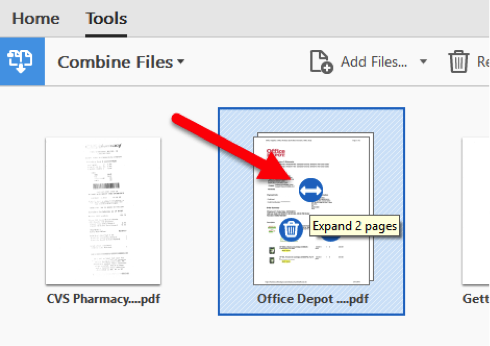
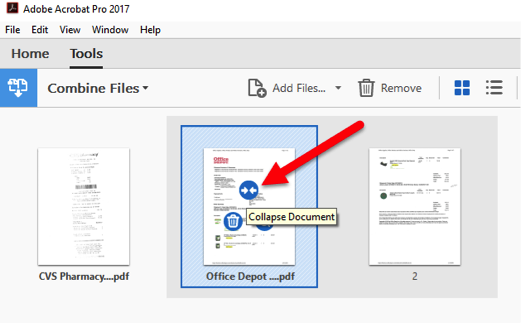
Multi-page documents are indicated by the double arrow icon. Hovering over that icon indicates the number of pages or slides.
Click that double arrow icon to expand so you can view the thumbnails of each page in the file and verify which pages to add to the combined PDF.
-
You can also arrange individual pages... in or around in the Combine Files dialog box as well as remove a document from the view.
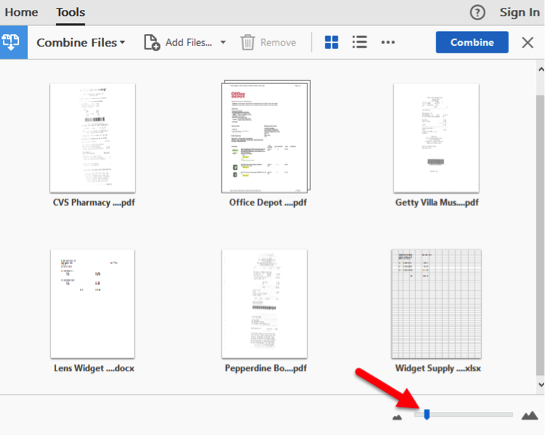
- Sometimes the thumbnails do not all fit in the display area. To decrease or increase
the size of the thumbnails, click the slider in the lower left corner and slide it
left or right.
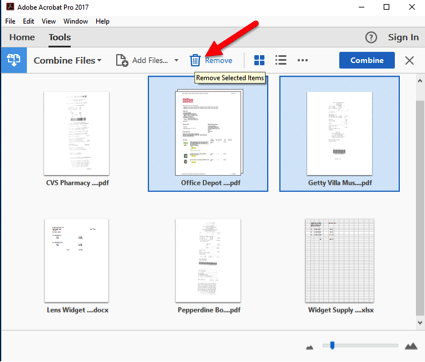
- To remove unwanted pages, or files, click the file or page preview, then click the
trash can icon.
Note: these pages are only removed from the combined PDF. The original file remains intact.
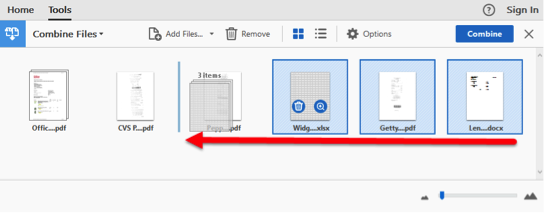
- To reorder pages, click the page thumbnail and drag it to its new location. A blue
line indicates where the page will be placed once you release your mouse
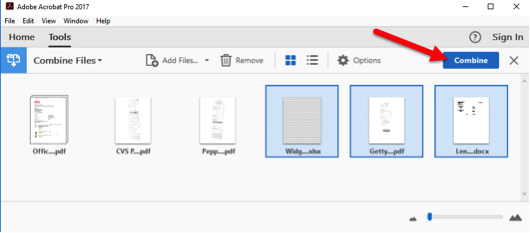
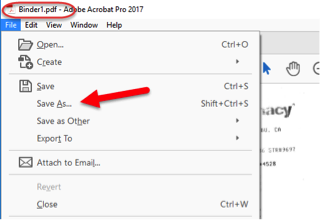
- When you are finished, click Combine Files. Note that Acrobat automatically names
(e.g., Binder1.pdf) and opens the new file once it finishes processing.
- From here, you should rename, and review the new document as necessary. You can also
select the Combine Files or Organize Pages tool in the toolbar to add more pages.
Last Updated: 10/12/2017