Courses: Getting Started for Faculty
Overview
This is a faculty "Getting Started" guide for Courses (powered by Sakai). With these steps, getting started with Courses is easy. Faculty members simply need to log in and begin using their course websites.
Table of Contents
- Site Setup Tips
- Accessing Courses
- Class Sites and Tools
- Favorite Your Sites
- Reorder Sites
- Upload Your Name Pronunciation
- Customize Your Site
- Publish Your Site
- Unpublish Your Site
- Modify the Course Overview Page
- Add Your Syllabus
- Verify that your Syllabus is Published
- Sign Up for Pepperdine Zoom
Site Setup Tips
Before you jump into the basics, please review these quick tips to help you get started with your class site.
- Don't be afraid to edit the Overview page. The Overview page is the home page of the site. Since it is the first thing that students see, use this space to communicate key information, like location, time, and contact information. Consider personalizing the space with a photo or even record and embed a short welcome video.
- Turn off any tools that you don't plan to use. This will streamline the left tool menu and avoid any student confusion. It's easy to add or remove tools in the class site menu.
- Use the Announcements tool for important notices. If you want to send an email message to all students (and have a backup of that message in case students accidentally delete the email!), then the Announcements tool within your Courses site is recommended. Be sure to select "High - all participants" when sending the announcement.
- Be sure that the syllabus you added is published! If you added your syllabus in the Syllabus tool, make sure that your students can see it. Did you select "Add and Publish" when you added your syllabus item or just "Add"? Check the eye icon next to your syllabus item. An eye-with-a-slash icon means that the item is hidden, while an eye icon by itself (no slash) means that it is published and visible.
- Check for Accessibility! When you add rich text to Overview, Lessons, Assignments, etc., be sure to use the CKEditor Accessibility Checker to identify any possible issues with the content you just added. Did you add alternative text to your images? Did you use headings properly? The accessibility checker can help you identify and fix problems.
- Register for Pepperdine Zoom. Before you can use the "Zoom Pro" tool in Courses, you need an official Pepperdine Zoom account. (You'll see a warning about an invalid email if you haven't signed up yet.) Register your Zoom account -- it's fast and easy!
- Register for Pepperdine Panopto. Panopto is our lecture capture platform and the backup location for your Pepperdine Zoom cloud recordings. You need to create your official Panopto account before you can use it. In a class site where you are the instructor, simply click the Panopto tool and your account will be automatically created. You can also visit panopto.pepperdine.edu and log in to create your account, too.
Do you want to learn more? Keep reading the Getting Started topics below to learn the basics of Courses. You can also check out our Courses training recordings and the Top 10 Courses Checklist for a New Academic term.
Accessing Courses
You can access your course site via the Courses login page:
- Visit https://courses.pepperdine.edu.
- Select Pepperdine Login at the top right.
- Enter your Pepperdine NetworkID and password, and then click LOGIN.
- You should be taken to your "Home" site on Courses. If not, simply navigate back to https://courses.pepperdine.edu.
Note: Courses works best on Firefox or Chrome for both Mac and Windows computers.
Trouble logging in? If you are a new faculty member, follow up with your hiring manager to confirm that
all hiring paperwork has been processed. You may also visit the "New Faculty and Staff Technology Guide." If you are a returning faculty member and you need to reset your password, visit
https://myid.pepperdine.edu.
Find Your Class Sites and Tools Inside Courses
When you are logged into Courses, you will see your personal "Home" site. As a returning faculty member, you may see tabs across the top of the window for your current or past classes. This is your "Favorites Bar." When auto-favoriting is enabled, site tabs will be added and ordered chronologically, based on the date that each site was created or your site membership was added. Up to 15 sites can display in your "Favorites Bar."
To view all of your sites or organize your "Favorites Bar," click the "Sites" menu (aka Sites waffle or grid) at the top right. Here, you will see class sites organized by each academic term. If you have many sites, use the "Filter Sites" search box to narrow the list. Click a star icon to favorite a site. Use the "Organize Favorites" tab to reorder your favorite sites.
Can't find a site? Sites are created based on the Course Creation Calendar and enrollments are updated each business day. Please be aware that Courses can only list information that has been entered into WaveNet. If you do not see your assigned class in the "Sites Menu" or via "Home" > "Worksite Setup," please consult with your academic division or program office to confirm that class information and instructor assignments have been entered properly in WaveNet.

Favorite Your Sites
In the full-screen mode, your favorite sites are displayed as tabs in the "Favorites Bar" below the Courses logo. Here, you can quickly access the most recently added sites. To add or remove sites from the "Favorites Bar," use the "Sites" menu. See the Favorite Your Sites video.
- Select the Sites menu (aka Sites "waffle") at the top right.

- To add a favorite, click the empty star icon next to the site's name to highlight
it.
- A site that has been selected as a favorite will display with a yellow highlighted
star:

- A site that has been selected as a favorite will display with a yellow highlighted
star:
- To remove a favorite (such as a class from a previous academic term), click the yellow
star icon next to the site's name to deselect it.
- A site that has been deselected as a favorite will display with an empty star:

- A site that has been deselected as a favorite will display with an empty star:
- Close the "Sites" menu by clicking the "X" at the top right.
- The "Reload to see your updated favorite sites" notice will appear. Click the Reload link to refresh the page and see your changes.

Reorder Your Favorite Sites
To reorder your favorites, use the "Sites Menu." Watch the Favorite Your Sites video to learn more.
Note: The favorites bar will only display up to 15 class sites. Once you reach 15 sites, additional sites will not display at the top of the page but can always be found in the "Sites Menu." Be sure to routinely manage your favorite sites to display the latest or most important sites that you want to quickly access.
- Select the Sites menu (aka Sites "waffle") at the top right.
- Select the Organize Favorites tab. Note: you must have at least two favorites to reorder sites.

- Drag and drop your sites into the desired order. Click and drag the right icon (three-line
icon) to move a site up or down.

- Close the "Sites" menu by clicking the "X" at the top right.
- The "Reload to see your updated favorite sites" notice will appear. Click the Reload link to refresh the page and see your changes.
Upload Your Name Pronunciation
In Courses, instructors may upload an audio recording of their name pronunciation and input accompanying phonetic details. This data will only be available in the Roster tool to user roles that possess the "View all participants" permission. Note: to successfully make a vocal recording of your name, you must have a functioning microphone on your computer. If necessary, be sure to enable/plug-in your microphone and install the latest hardware drivers to your computer.
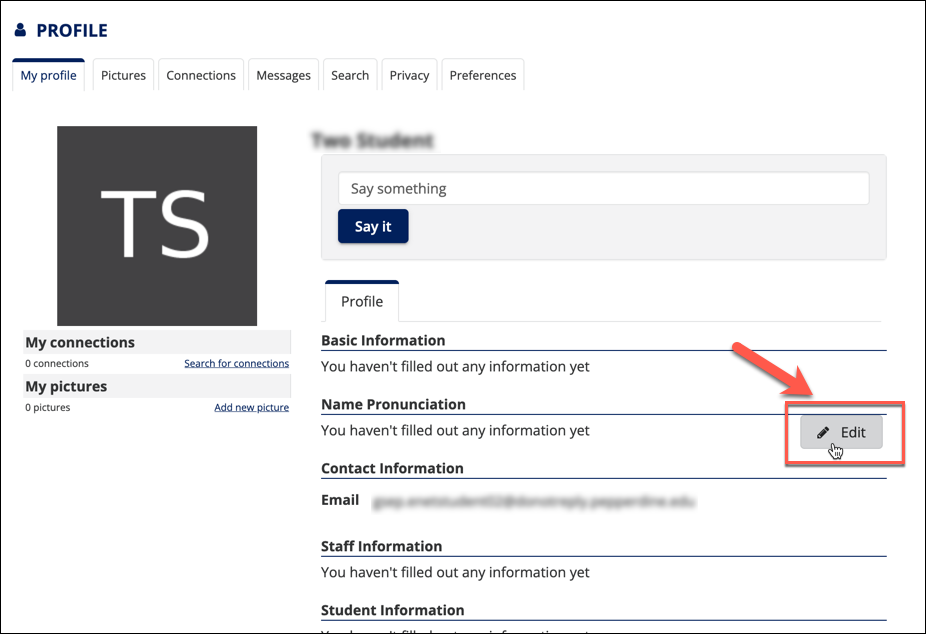
- In Courses, click the Home site and select Profile in the tool menu.
- On the My Profile tab, locate the Name Pronunciation section.
- Hover your mouse cursor over the area (or tap the heading on mobile) to reveal the
"Edit" button, and then click Edit.
- (Optional) In the "Pronouns" field, select a pronoun option in the drop-down.
- In the "Phonetic Pronunciation" field, input a textual guide corresponding to the
pronunciation of your name. Examples include:
- kris-TEEN BEAR-it (i.e. Christine Barrett)
- j-AHN BUCK-ing-ham (i.e. John Buckingham)
- j-ORE-dan lot (i.e. Jordan Lott)
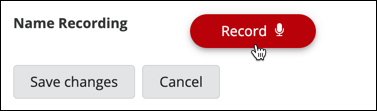
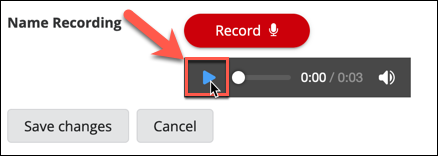
- Next to the "Name Recording" label, click the red Record button.
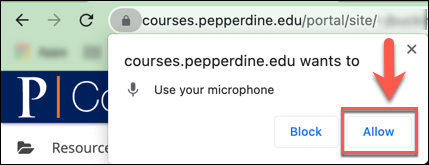
- Important: your web browser may prompt you to "Allow" courses.pepperdine.edu to use
your microphone. Be sure to click Allow.
- Clearly speak your name into your microphone and click Stop when finished. Note: there is a maximum recording time of twenty (20) seconds.
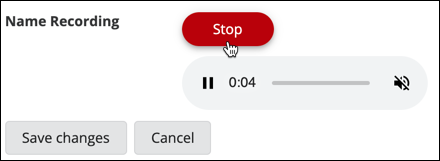
- Using the recorder, click the Play button to preview your recording.
- If you wish to re-record your name, follow steps 6–9 above.
- When finished, click Save Changes.
Customize Your Site
Every course or project site has its own set of tools. When you click a course tab in the "Favorites Bar" or via the "Sites Menu," you will go to that site. On the left, you will see the currently installed tools. You can add, remove, reorder, and rename tools by visiting the "Site Info" tool.
- Navigate to the course site.
- Click Site Info. It's the orange tool in the left menu with the gear icon.

- To add or remove tools:
- Click "Manage Tools."
- To add a tool, select the checkbox next to the tool.
- To remove a tool, deselect the checkbox next to the tool.
- Click "Continue."
- If prompted to provide more information (such as a custom name for a "Lessons" page or a website address for "Web Content"), enter the appropriate information and click "Continue."
- Review the changes.
- Click "Finish."
- Click "Manage Tools."
- To reorder, rename, or hide tools:
- Click "Tool Order."
- To reorder, drag and drop the tool into the desired location. Click the icon left
of the tool name (three lines) to position.

- To rename, click the gear icon at the right and select "Edit Tool Title."

- Edit the tool name.
- Click the green checkmark icon to save the new name.

- To hide tools, click the gear icon at the right. There are two options to hide tools:
- Make Tool Invisible to Students: This option will "hide" the tool name from students in the left navigation. Content within the tool may still be accessible by students if instructors provide direct links to the content.
- Lock Access to this Tool: This option will disable the tool from students completely; they can neither see the tool nor access any of its content.
- Note: Not all tools have these options. For example, you can hide or lock the Announcements tool, but you can only hide the Syllabus tool.
- To reorder, drag and drop the tool into the desired location. Click the icon left
of the tool name (three lines) to position.
- Scroll to the bottom of the page and click "Save" to finish.
- Click "Tool Order."
- To update the site language, site description, or site owner:
- Click "Edit Site Information."
- To edit the "Site Language," select the desired language from the "Site Language" box. This will impose a specific language for the interface of the site.
- To edit the course "Description" displayed on the Overview tool, use the rich text editor under "Description."
- To change the site owner's information, scroll down and change the name and contact email address of the site owner.
- Click "Continue" to preview your changes.
- Click "Finish" to save.
- Click "Edit Site Information."
Publish Your Site
When new course sites are created, they are "unpublished" and invisible to students. This allows you, the instructor, to post your materials and configure your tools before students visit the site. When you are ready for students to interact with your course site, you must "publish" your site.
- To publish your site, visit your class site and then click the Publish Now button at the top of the window. This will immediately publish an unpublished site
so your students can see your site.

- (Optional) Alternatively, you may also click "Site Info" and then click "Manage Access."

- Select "Publish site" to make your course available to your students.
- Click "Update" to finish.
NOTE: To unpublish a site, repeat the alternative step immediately above, but select "Unpublish/Leave as Draft."
When should professors publish sites?
The publishing of a class site is at the professor's discretion. Each school or program may establish its own guidelines or standards, so professors are encouraged to speak with their program/division offices or the lead professors in their program for guidance.
The benefits of publishing a site as early as possible:
- Student peace of mind. Publishing the site early can ease tension or anxiety for your students so that they are not questioning whether they are enrolled properly or not.
- Announcement emails. If you want to send an announcement via email to all students using the Announcements tool, you must publish your class site first.
- Textbooks and required materials. Students need time to purchase textbooks or other items before the start of class. If these requirements are only listed in your syllabus, and the syllabus is only present in your class site, publish the site as early as possible so your students can be prepared.
There are several strategies professors can use to hide select tools or content as they are setting up and designing a site while still publishing a site so that students can access the syllabus and receive announcements. Professors may schedule a one-on-one consultation to learn how.
Unpublish Your Site
Occasionally, faculty may find the need to unpublish a previously published course site. Faculty can do this in a few quick steps:
- Navigate to the course site.
- Click the orange Site Info tool and then select the Manage Access tab.
- Under the "Site Status" section, select "Leave as Draft."
- Click Update to finish.
Modify the Course Overview Page
Edit the Overview Description
When official course sites are created, you will see one of two options, based on the selection made by your school:
- Course Description: This is the text-only class description as entered by your school into WaveNet.
- School "Welcome" Template: This is a formatted template with placeholders for common information, such as class location, office location, email address, office number, etc. Professors are expected to edit this content and update it with their information.
As the class instructor, you may remove or modify this information to meet your needs. Other options include adding a picture of you or your textbook, listing learning outcomes, or listing or linking to any communication norms or expectations.
- Navigate to the course site.
- Select the Overview tool, if it is not already displayed.
- Click the Edit icon at the top right of the "Welcome" box.
- In the "Title" field, instructors may consider changing "Welcome" to something else, like your course title.
- In "Description," consider adding the following:
- The purpose or key learning objectives of the course
- A picture of you, your class textbook, or an image that represents your class or subject
- Your office hours and location
- Your contact preferences (email, phone)
- A brief introductory video to welcome students to your class and give tips on how to get started or make the most out of the site.
- Click Update Options to save your work.
Change the Layout of the Overview Tool
Instructors also have the option to manage the layout of the Overview tool and the presentation of the tool widgets within it.
Note: A tool must exist in the class site in order for its corresponding widget to display on the Overview page. Possible widgets include Site Information Display (Overview Description), Recent Announcements (Announcements), Recent Chat Messages (Chat), Calendar, and Message Center Notifications (which includes Messages and Discussions/Forums). If you don't see a widget that you plan to use, then add the appropriate tool(s) to the site first.
- Click the Manage Overview button at the top right of the Overview tool.

- Next, toggle the layout of the Overview page by specifying whether you would like a single-column or double-column layout.
- In the "Current Widgets" section, toggle the "Move" arrows to adjust the location and order of the widgets. Depending on the layout option that you selected, you can move widgets up/down, left column/right column, etc.
- (Optional) Remove any undesired widgets by clicking the red "X" icon in the remove column.
- In the "Available Widgets" section, select any unused -- and available -- widgets you would like to add to the Overview page.
- Click Save when finished.
Note: The "Manage Overview" functionality is natively stored within the "Site Info" tool. The button at the top right of the Overview page is a shortcut to the setting within "Site Info." Click the "Overview" tool again to see the changes you have made.
Add Your Syllabus
The "Syllabus" tool in Courses will help you post one or more syllabus-related documents to your course site. You can attach documents, redirect to an external web page, copy/paste text, or write text directly in the rich-text editor to describe your course objectives and requirements.
Graziadio Course Syllabus Tool
Note: If you are a Graziadio professor and have the "Course Syllabus" tool in your site, refer to the Graziadio syllabus documentation.
Syllabus Tool
- Navigate to the course site.
- Click Syllabus in the left tool menu.
- Click the Add tab.

- A new page will load. Enter a title for your item (e.g. "Fall 2021 Syllabus"). This is a required field.
- Select the desired type of syllabus item(s):
- Create a single syllabus item: Select this option if you only need to upload or copy/paste a single syllabus. This option will be appropriate for most users.
- Create syllabus items by number of items needed: Select this option if you wish to break your syllabus into multiple sections, each as a unique syllabus item. If you have combined multiple class sections into one course site, you may also want to post separate syllabi for each section. A drop-down menu will appear to ask you how many items or syllabus sections you wish to create.
- Create syllabus items by dates: Select this option if you want multiple syllabus items organized by dates. Similar to the option immediately above, this option is suitable for instructors who wish to configure start/end times and dates for their syllabus item(s). If selected, you will be able to specify start date, end date, start time, and end time options for each day of the week.
- If you opted to create a single syllabus item, a new page will load.
- If you chose the "number of items" or "by dates" options, the items will be created and you will be taken to the "Manage" screen to edit each item.
- On the "Edit Syllabus Item" page, enter the content.
- You may write, copy/paste information, or leave the "Content" rich text editor box blank.
- To attach a document, click Add attachments. NOTE: It is generally recommended to upload your syllabus in PDF format. See instructions on saving your Word doc as a PDF.

- In the "Add Attachment" dialog box, you can choose to:
- Upload file(s) from your computer. Click "Choose File," navigate your computer, select the desired file, and click "Open."
- Point to an outside website link (URL). Enter the address in the "URL" box and click "Add."
- Select an existing document from the "Resources" tool. Scroll down and review the listed files and folders. Click "Attach a copy" next to the desired file.
- NOTE: Click Continue when finished.
- (Optional) Adjust and start/end dates and times for your syllabus item.
- (Optional) Generate an email notification once published. A setting of “High” will generate an email notification to all site participants. A setting of “Low” will generate an email notification only to those site participants who have not opted out of low priority notifications.
- Click Publish once finished.
Can Students See Your Syllabus?
If you selected "Publish" when you added a new syllabus item, the item will be viewable to everyone in the site. If you selected "Save Draft" only, then this made the item a "draft" item that is hidden from students. Never fear! You can manage (aka publish/unpublish or show/hide) your syllabus with a few clicks!
- Click the Manage tab.

- Select Edit Details beneath the desired syllabus item.

- On the resulting page, scroll down to "Publish" (show the item to students) or "Save as Draft" (to hide the item from students) as appropriate.
Sign Up for Pepperdine Zoom
Do you plan to use Pepperdine Zoom to offer online classes or office hours? Be sure that you sign up for Pepperdine Zoom!
Note: You cannot use the "Zoom Pro" tool in Courses until you sign up for Pepperdine Zoom. You will receive an error that your instructor email is invalid until you sign up.
- Go to zoom.pepperdine.edu.
- Click Sign In.
- Enter your Pepperdine NetworkID and password, and then click Login.
- Done! You have now created your official Pepperdine Zoom account. You can return to Courses and use the Zoom Pro tool to schedule meetings in your class site(s).