WaveNet for Students: Class Registration Guides
Overview
On this page, you will find instructions on how to register for classes on WaveNet from your student center. Choose the appropriate links below for step-by-step instructions on how to search for classes and how to add and/or drop classes during pre-arranged registration periods.
Note: Students cannot register until their enrollment appointment time, which is available on the Home page. Select a term, and if an active enrollment appointment exists, a message will appear above the shopping cart.
Table of Contents
Add a Class by the Class Number
- Within the Home view in the current or upcoming term, select the "Class Search" link under the Shopping Cart to add classes to your shopping cart.
- In the pop-up, add classes to the shopping cart by entering the class number (not the catalog number; e.g., for COM 180, do not enter 180, but enter 1156) in the "Enter Class Nbr." box, then select the "Enter" button to continue.
- Select the "Next" button to add the class to your shopping cart. A new pop-up window appears with the class added to the shopping cart.
- Then go back to the Home page. Your shopping cart will display the class added.
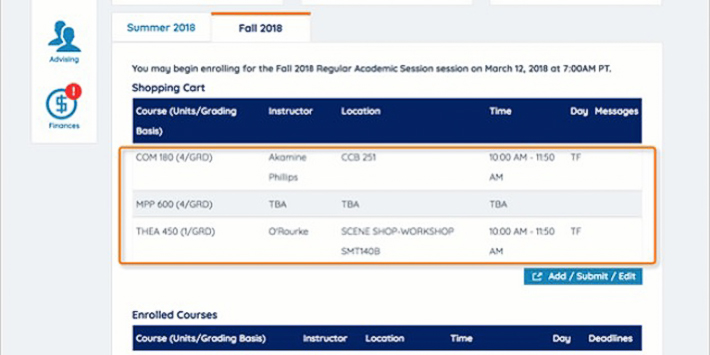
- Once all of your classes are selected, choose the "Add/Submit/Edit" button, and the "Add Classes to Shopping Cart" pop-up will appear again.
- Check the boxes to select the classes into which you wish to enroll.
- Click the Validate button to determine any potential problems. A pop-up window appears with a status report.
- If the class(es) are OK to add, select the Shopping Cart button.
Note: Use the Delete button to remove unwanted classes (select the check box for those classes you wish to delete).
- Back on the Add Classes to Shopping Cart window, select the check box for the class and choose the Enroll button.
- A Confirm classes pop-up window appears. Look over your schedule and select the "Finish
Enrolling" button to complete registration. You can also use the "Cancel" or "Previous"
buttons to cancel your session or go back and change classes, respectively.
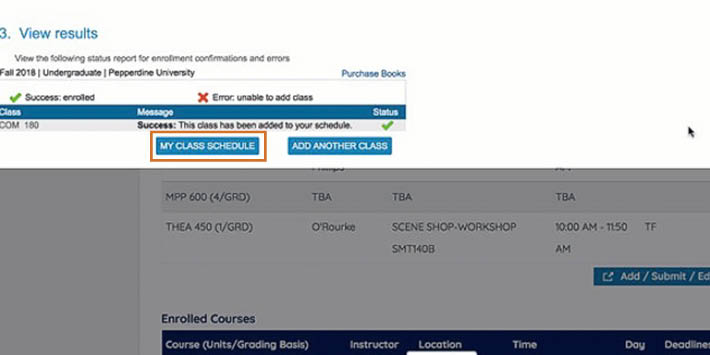
Note: Check the "I Agree" box and select the "Finish Enrolling" button. - Your enrollment results will display on the next page. To view your classes, select
the "My Class Schedule" button.
- Use the "X" or close button to dismiss the "View Results" pop-up window. To end your session, choose "Logout" in the upper right-hand corner of the screen to end your WaveNet session. Close your browser window.
Add a Class by Searching for a Course
- Within the Home view in the current or upcoming term, choose the "Class Search" link under the Shopping Cart to add classes to your shopping cart.
- In the pop-up, add classes to the shopping cart by selecting the "Search" button to search for classes.
- Enter Search Criteria by Subject or enter a course number.
Note: Use the Subject pull-down menu to narrow the search results by program. Select the Additional Search Criteria option to expand and get a more comprehensive list of search criteria.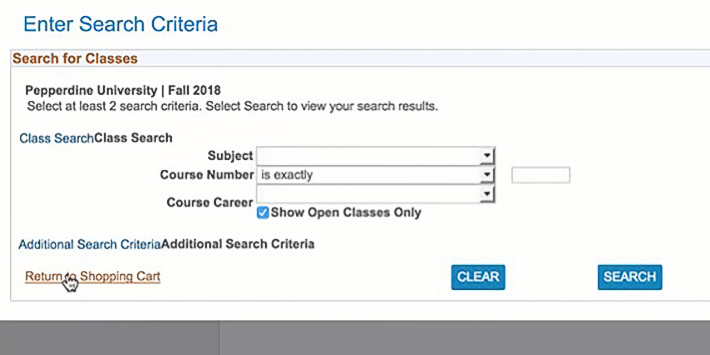
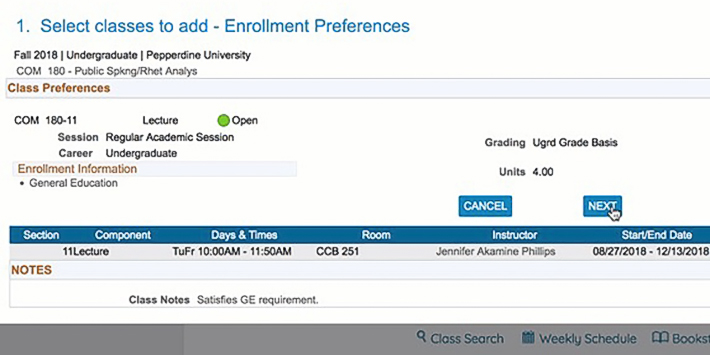
- Your results will pop up on the next page. Choose the "Select" button next to the class you wish to add.
- An enrollment preference box appears. Select the "Next" button to add the class to
your shopping cart. Repeat this step as often as necessary to complete your course
schedule.
- Back in the shopping cart, select the check box for those classes into which you wish to enroll. Once all of your classes are selected, choose the "Enroll" button. Note: You may wish to validate to determine any potential problems. A pop-up window appears with a status report.
- When you are ready to enroll, select your classes and then choose the "Enroll" button.
- A Confirm Classes pop-up appears. Review your schedule and select the "Finish Enrolling"
button to complete registration. You can also use the "Cancel" or "Previous" buttons
to cancel your session or go back and change classes.
Note: Select the "I Agree" box, and then select the "Finish Enrolling" button. - Your enrollment results will display on the next page. To view your classes, select
the "My Class Schedule" button. If you still wish to add more classes, choose the
"Add Another Class" button.

- Use the "X" or close button to dismiss the View Results box. To end your session, choose "Logout" in the upper right-hand corner of the screen to end your WaveNet session. Close your browser window.
Drop a Class
- In the Home view, select a term to see your enrolled classes. Select the Drop button.
- On the next page, select the classes that you wish to drop by selecting their corresponding boxes directly to their left, and then use the "Drop Selected Classes" button.
- A page listing the classes you selected for drop will appear. Review these selections and select the "Finish Dropping" button to finalize the drop.
- The results of the drop will show up on the next page. Use the "My Class Schedule"
link to review your class schedule post-drop.

- Close the window to return to the Student Center.
- Choose "Logout" in the upper right-hand corner of the screen to end your WaveNet session. Close your browser window.