WaveNet Guest Access
Overview
Students may authorize "guests" (such as parents, grandparents, spouse, assistant, employer, etc.) to access their student account information. Individuals that are designated by the student will use the Guest Access feature to access the student's account information or to make a payment toward the student's account balance via WaveNet, the University's online community.
Access to a student's online records is based on the student's access to his/her own records through WaveNet. Once the student no longer has access to his/her records online through WaveNet, a guest's online access will also end. The student reserves the right to change and/or end guest access to his/her student information at any time.
Please read the following information carefully regarding Guest Access features and procedures.
Quick Links
- Step 1: Student Invites a Guest
- Step 2: Guest Receives the Invitation from the Student
- Step 3: Guest Creates a Guest Access Account
- Step 4: Access Student Information/Guest Access Center
- Once a guest has created an account:
- Log in to WaveNet
- Use the Guest Access Center link under the Guest tab
- Navigate the options and information available (varies based on chosen permissions).
- Once a guest has created an account:
- (optional) Student Edits Guest Access Permissions
Step 1: Student Invites a Guest
Each student can assign guest access so that others can review information, make payments, etc.
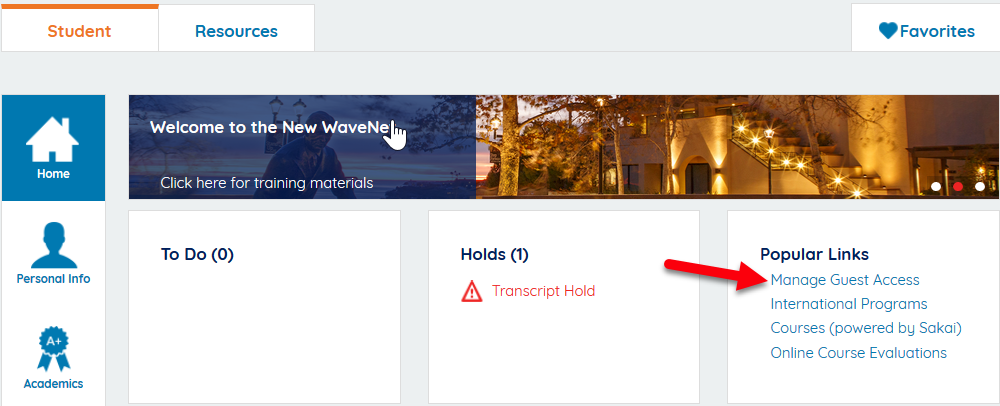
- Log into WaveNet.
- On the Student Center homepage, click Manage Guest Access under the heading "Popular Links."
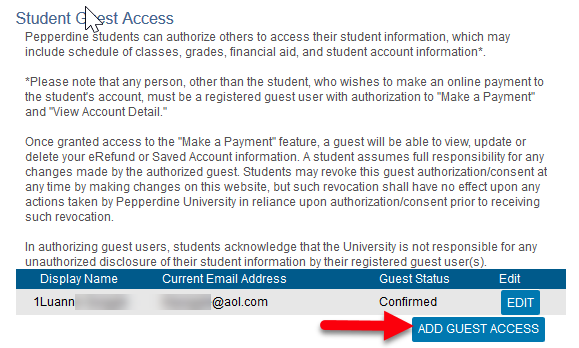
- On the Student Guest Access page, click Add Guest Access.
- In the "Current Email Address" field, enter the guest's email address.
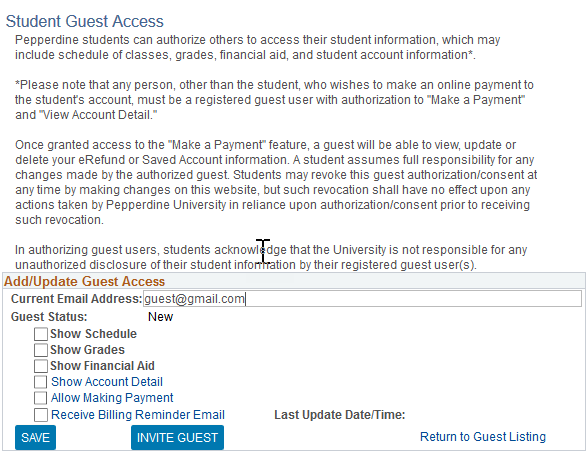
- Under "Guest Status", select the access permissions for the guest. Examples include:
- Show schedule
- Show grades
- Show financial aid
- Show account detail
- Allow making payment
- Receive billing reminder email
- Click Invite Guest to send an email invitation to the person.
Important Considerations
- If you plan to add a guest with "Allow making payment," we recommend that you also select "Show account detail." This way, the person will see the amount due. Otherwise, you will need to notify the person about the amount of each payment.
- Please be aware that guests with access to make a payment will also have access to view and update any saved checking and or savings accounts that the student has previously stored for future payments. The guest will also have access to view and update the direct deposit account information established by the student for eRefunds.
Step 2: Guest Receives Invitation from Student
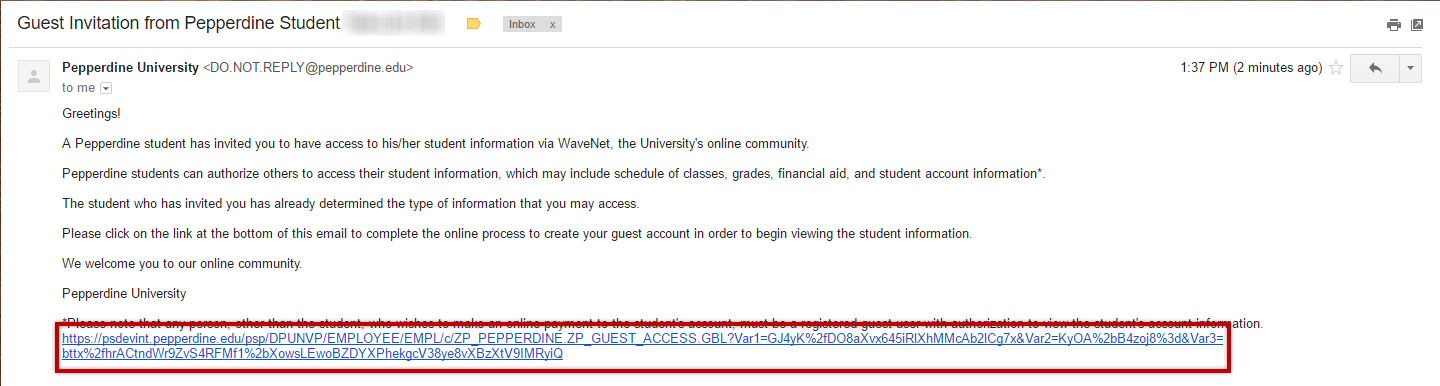
When a student authorizes a guest to access his/her student information, the guest is sent an invitation via email. The email invitation includes a link to the Guest Access Account Creation page.
The guest should click the link in the email to initiate the guest account creation process.
Step 3: Guest Creates a Guest Access Account
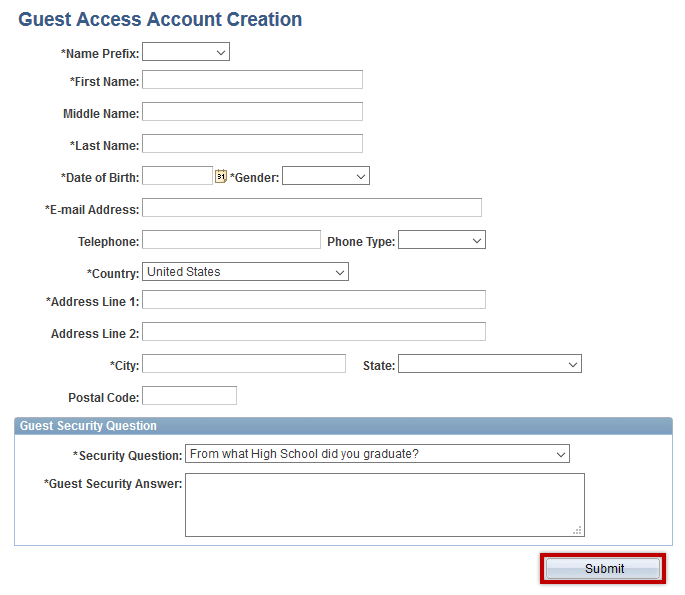
After clicking the link in the invitation email, the Guest Access Account Creation form will appear. The required fields are indicated with the asterisk (*) character (e.g. first name, last name, date of birth, etc.). This information allows Pepperdine to create a unique account for each guest within WaveNet, the University's online portal.
- The guest will enter the required personal information.
- Select and provide the answer for a "Guest Security Question" for validation purposes.
- Click Submit when finished.
An email will be sent to the guest upon successful account creation. An additional email will be sent with the WaveNet link and login details.
Step 4: Guest Uses Guest Access Center
Once a guest has created an account, the person may now log into WaveNet and use the Guest Access Center.
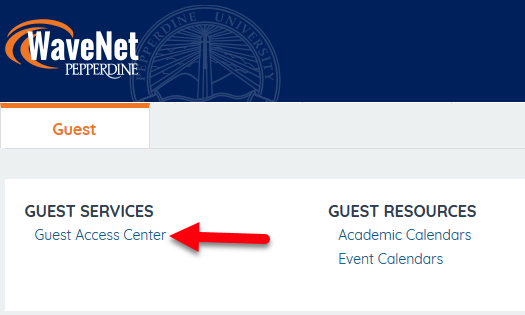
- The guest user will log into WaveNet.
- Click the Guest Access Center link under the "Guest" tab.
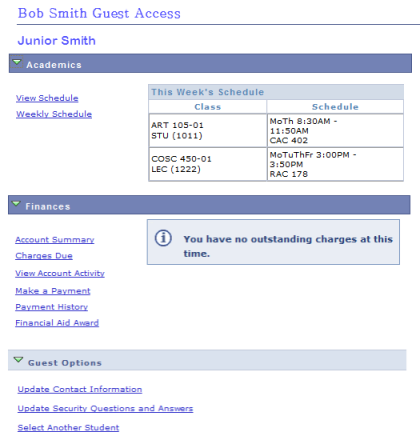
- Navigate the options and information available. The details and links will vary based
on the permissions chosen by the student. The following image is an example of the
following options: Show schedule, Show financial aid, Show account detail, and allow
making payment.
Note for Guests
- If you forgot your login information, contact Tech Central at 310.506.4357 (HELP).
- Once a guest account has been created, the student may update the guest's access at any time. The student may add or remove access to different features.
- If the guest helps multiple students, the guest may click the "Select Another Student" link at the bottom of the current student's Guest Access summary to switch to another student.
Step 5: Student May Edit Guest Access Permissions
If a student wishes to grant or revoke access permissions, this can be easily accomplished.
- The student logs into WaveNet.
- On the Student Center homepage, click Manage Guest Access under the heading "Popular Links."
- On the Student Guest Access page, click the Edit button next to the guest's listing.
- Modify the information for the guest, e.g. check or uncheck options.
- Click Save when finished.
Important Considerations
- When you graduate, the guest access feature in WaveNet will automatically be revoked for your guests.
- However, your information sharing preferences will remain after you graduate for any guests. If you wish to prevent future disclosure after graduation, be sure to use the steps above to edit guest access before your account transitions from student to alumni.