Digital Signatures Solution–eSign

Overview
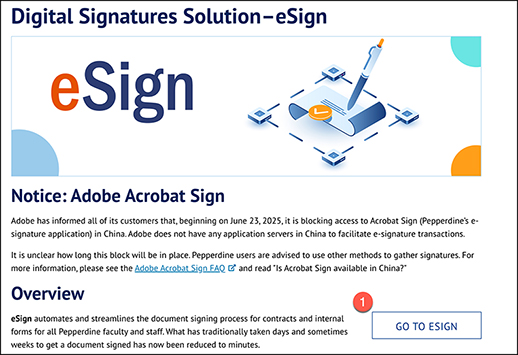
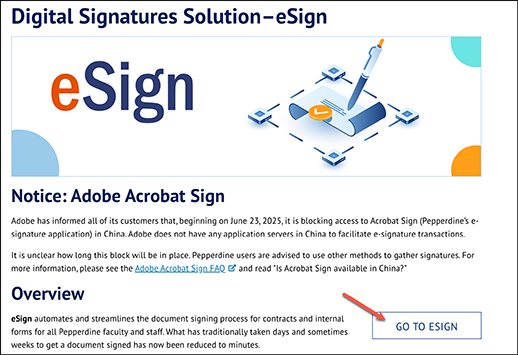
eSign automates and streamlines the document signing process for contracts and internal forms for all Pepperdine faculty and staff. What has traditionally taken days and sometimes weeks to get a document signed has now been reduced to minutes.
Benefits
- Legally and securely send documents for signatures online as easy as sending an email
- Conveniently sign documents using any web browser or device, anywhere and anytime
- Easily track document status and send reminders to signees online
Are Digital Signatures Legal?
Yes. A digital signature is the same as a wet signature in accordance to the California
Uniform Electronic Transactions Act (codified at California Civil Code secs. 1633.1
- 1633.17) and the Electronic Signatures in Global and National Commerce Act (15 U.S.C.
7001 - 7006).
Working with eSign
You can check out our eSign Basics Series of videos or refer to our step-by-step instructions below.
Note: Versions of Acrobat change over time. You may refer to the built-in help of your software for how-to instructions or guidance.
Acrobat 2024 and 2025
- Open Adobe Acrobat.
- Select one of the following options:
- Option 1: The file has not been opened yet.
- From the Adobe Acrobat start page, choose "See all tools." On the "All tools" page, select "Prepare a form" under the "Edit" heading.
- Optionally, you may select the main "Menu," select "Create," and then choose "Create a form."
- Option 2: The file you want to use is already open in Acrobat.
- On the file tab, use the "All tools" left panel and choose "Prepare a form." If "Prepare a form" is not listed, select "View more" and then choose "Prepare a form."
- Option 1: The file has not been opened yet.
- Choose "Select a file" or if the document is already open, choose "Create form" under the highlighted document.
- At the top left panel of "Prepare a form," select the three-dot "Options" icon, and choose "Prepare form for e-signing." This will convert the file to an Adobe eSign document.
- Under the "Add Form Components" heading, use the appropriate options for your form.
- In the document or the right panel, review any auto-detected form boxes for accuracy. You may delete them or right-click, select Properties, and modify them to the desired form type and details.
- When done, save your file.
Older Versions of Adobe Acrobat
Follow the step-by-step directions below or watch the Configure a PDF for eSign video.
- Open Adobe Acrobat
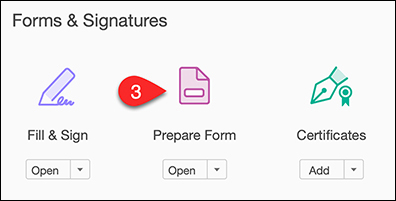
- Open the Tools panel in the top left corner of the screen.
- Scroll down to the "Forms & Signatures" section and select Prepare Form.
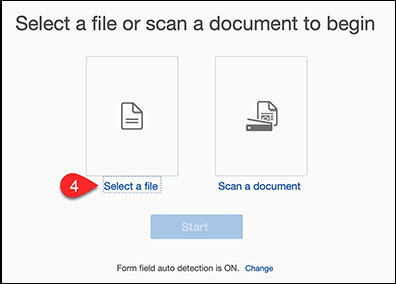
- Click "Select a file" to open the pdf file from your computer that will become the
form to be sent and signed.
- Once a file has been selected, click the "Start" button.
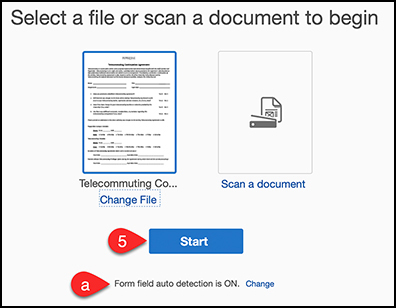
- Adobe Acrobat will attempt to find all the form fields that need to be entered for you. You will still need to update/modify fields before you are finished.
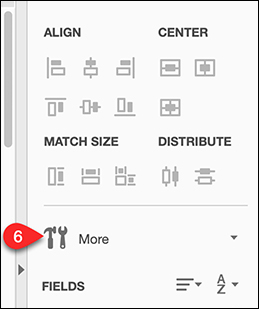
- In the right side pop-out panel, select "More" and "Convert to Adobe Sign Form".

- Add any fields that need to be entered into the form (like printed names, dates, or
additional form details) by selecting the "Add a Text field" icon in the task bar
at the top of the form. Learn more about creating and editing forms in the "Creating
and Editing Forms" in the Acrobat XI: Creating Forms course.

- Move your mouse to the spot you'd like the box to appear and use a single mouse click
to insert the box.
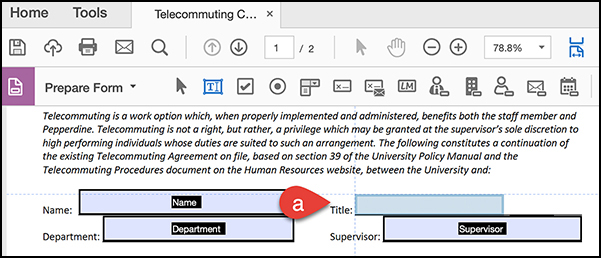
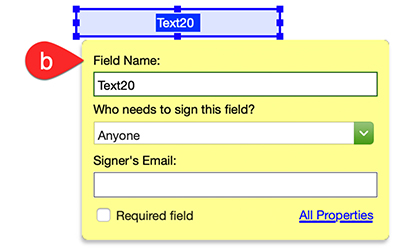
- Edit the title for the field in the pop-up editor that appears. Note: Assigning signees
will occur in later steps. You only need to edit "Field Names" in this step.
- Move your mouse to the spot you'd like the box to appear and use a single mouse click
to insert the box.
- Review the auto-detected fields and edit/modify/delete all field names or properties
as needed.
- Double left click or Right Click on each field to open the properties and update the field name.
- OPTIONAL: If you need to add a new signature box in a spot not already identified
by the auto-detection tool that processed the file when you first opened it with the
"Prepare Forms" tool (Step 5a), select the "Add a Signature field" icon from the task
bar.

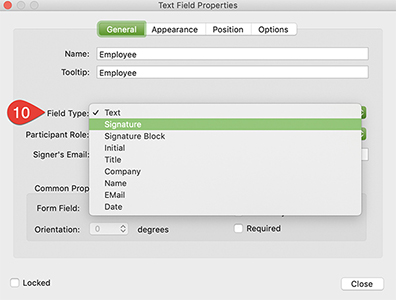
- Convert any auto-detected signature lines from standard text boxes into signature
boxes by double-clicking on the text box to open the properties and change the Field
Type from "Text" to "Signature."
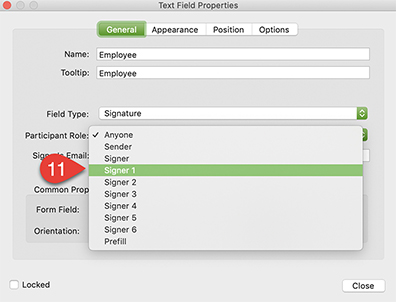
- For each signature field or text field that requires a specific signer to complete,
update the "Participant Role" to Signer 1-6. This should be setup to match the order
you will want signatures to be collected in eSign. (e.g. Employee Signature - Signer
1, Supervisor - Signer 2, Dean/Department Head - Signer 3, VP/Provost - Signer 4)
Note: Do not enter Signer email address. Email addresses will be identified before
it is sent out using eSign.
- Repeat Step 11 for each signature or text field in the form that requires a specific order of completion.
- Save your document.
Follow the step-by-step directions below or watch the Sending Out a Single Document for Signatures video.
- In a web browser, go to https://community.pepperdine.edu/it/tools/esign/ and select "Go to eSign."
- Log in using your Pepperdine credentials (NetworkID and Password).
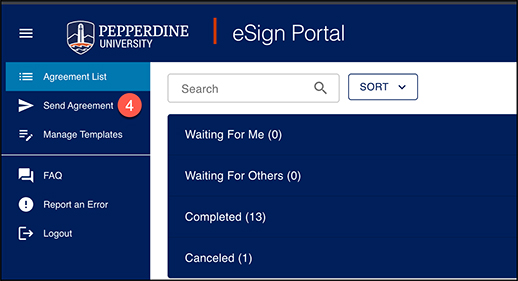
- Click the “Hamburger” icon in the upper left corner of the page to display the Navigation
Menu.
- Click "Send Agreement."
- Complete the “Send Agreement” form for a “Single” Send.
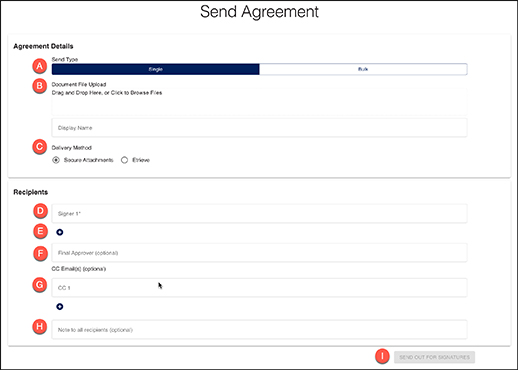
- Select "Single" from the "Send Type" options box. (Bulk Send is used when the user wants to send the same document out to multiple different people to sign. It allows the sender to do a single send process multiple times for the same document. See additional information on "Bulk" sends in the eSign FAQ.)
- Inside the "Document File Upload" field, drag and drop your PDF form that was configured using Adobe Acrobat (Instructions can be found on this webpage), or click inside the textbox to open the file viewer on your local computer. Select the desired PDF form, and click "Open" in your file viewer to upload the file to eSign to send it out for signatures.
- For the “Delivery Method” dropdown, choose "Secure Attachments". **Only select "Etrieve" if you have received prior instruction on this process and Application Management has created the correct workflows for this to function properly.**
- In the "Recipients" field, enter the email addresses for “Signer 1”.
- If multiple signatures are needed, click the “plus” button to add “Signer 2”, “Signer 3”, “Signer 4”, and so on. Also, please be aware that you need to add the email addresses in the order of each person who will need to sign the document (Signer 1, Signer 2, Signer 3).
- The final signature is considered the "Approver" and is added in the "Final Approver" field. Note: This field is optional.
- The "CC Email(s)" field allows you to send a notification to the selected email address that the form has been sent out for signatures. To “cc” multiple people, click the “plus” button to add additional email addresses. Note: This field is optional.
- Use the “Note to all recipients" field to share information with recipients. Note: This field is optional.
- Click "Send out for Signatures". Note: The document will be delivered to all the indicated email addresses for signature.
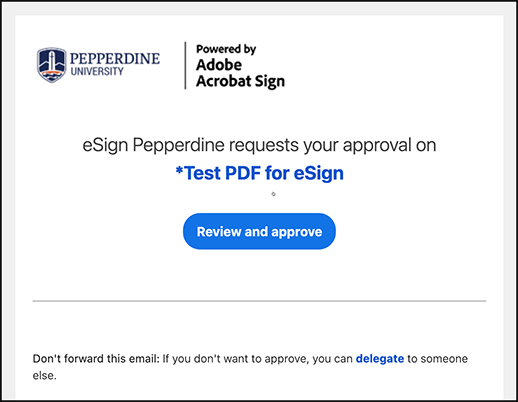
- The first signer will receive an email from eSign Pepperdine via Adobe Acrobat Sign
(adobesign@adobesign.com). Be sure to check the SPAM filter if notifications are not
being received as expected. Note the name of the document, along with the list of
recipients.
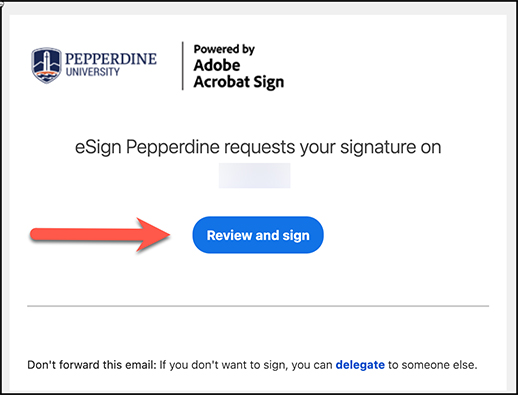
- Click the blue "Review and Sign" button to open and sign.
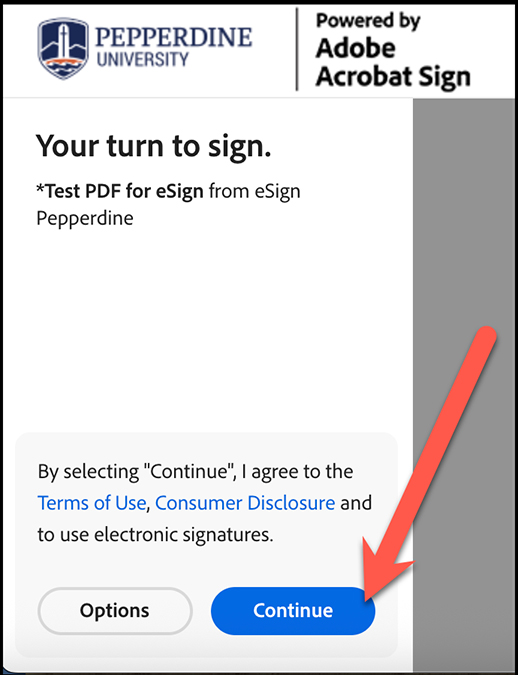
- Click the blue “Continue” button in the lower left-hand side of the screen to agree
to Adobe’s Terms of Use.
- Read the document in full to confirm that you should complete the form as requested and provide your legally binding signature.
- Click the blue "Next" button to fill out the next requested fields.

- When you reach your signature field, select "Click here to sign" to open up the signature
window.

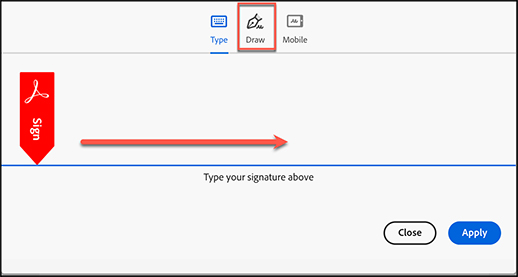
- Select how you would like to enter your signature.
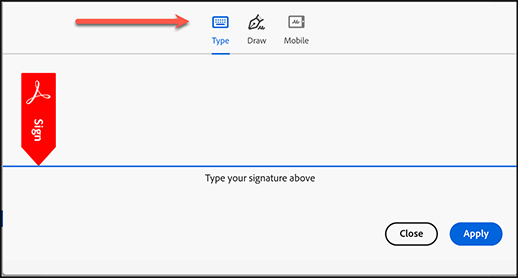
- To “type” your signature, click on the "Type your signature above" section and enter
your signature using your keyboard. The entered characters will be stylized to look
like a written signature.
-
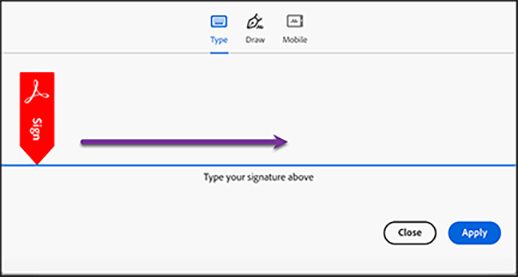
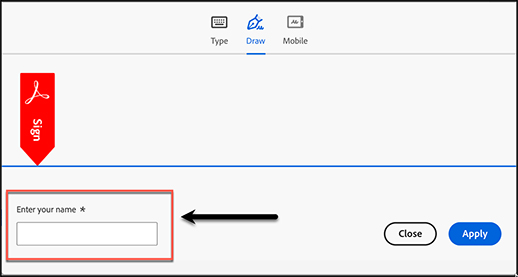
To “draw” your signature, select that option, and use your mouse or touchscreen to
draw your signature in the "Type your signature above" section. Next, enter your name
using your keyboard in the "Enter your name" field in the bottom left corner of the
signature window.
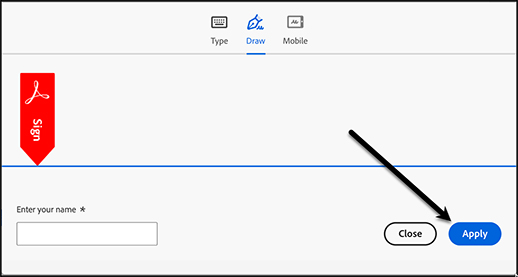
- Select "Apply" to add your signature to the document.
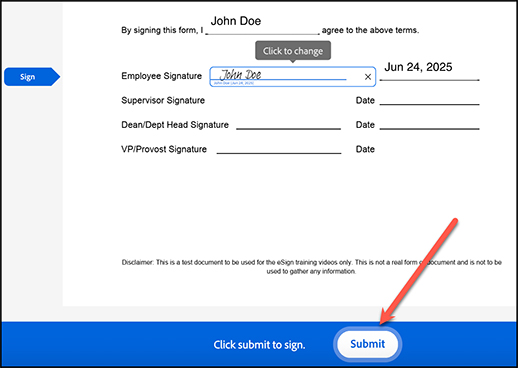
- Review all of the entered fields in the document for accuracy.
- Once all of the requested fields have been entered and your signature has been added,
select the Submit button to complete your portion of the form.
- Once the document finishes processing, you can close the browser tab.
- If you are the "Approver" or final signature, on the document as assigned by the person
that sent the document out for signatures, the process will mostly be the same. You
will "approve" the document with your signature rather than just signing the document.
- Once all the recipients have signed the document and the Approver has approved, the
person that sent the document out for signatures will receive an email with a link
to download the completed document through "Secure Attachments" as selected in the
send process.
Follow the step-by-step directions below or watch the Navigating the eSign Portal video.
- In a web browser, go to esign.pepperdine.edu and select "Go to eSign".
- Log in using your Pepperdine credentials (NetworkID and Password).
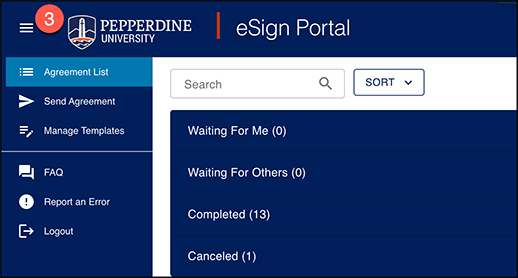
- This is the eSign Homepage.
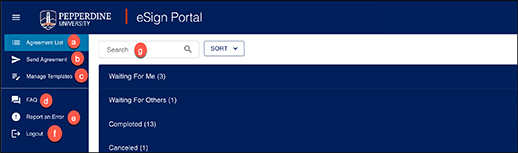
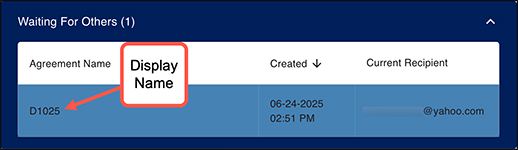
- Agreement List: View your existing documents by "Waiting For Me", "Waiting For Others",
"Completed", and "Canceled". The number of docs in a section is displayed with the
title (e.g. Waiting For Me (3).
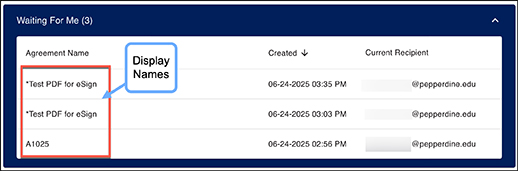
- In each section, you can view each document's Display Name, Created Date, and Current Recipient.
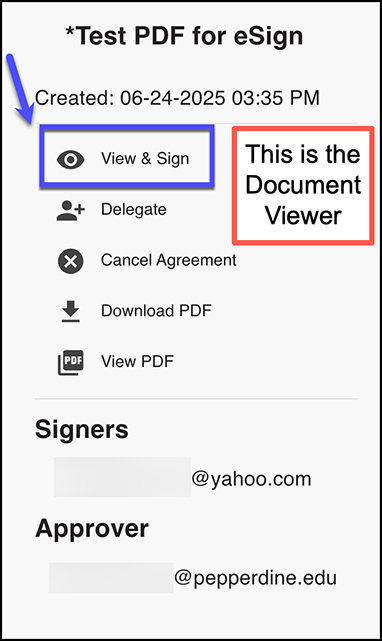
- Click the Display Name to open the info panel and download the document in its current state.
- In “Waiting For Me”, click the display name for the document to open the document
viewer, and then select “View and Sign” to complete the signature process.
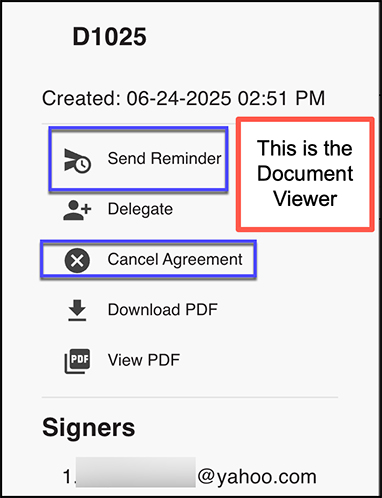
- In "Waiting for Others," click the display name for the document to open the document
viewer and send a reminder, or to cancel the request for signatures. Note: The reminder
is sent to the current recipient that needs to sign the document.
- Send Agreement: Create a new request for signatures by selecting "Send Agreement" and completing the necessary fields.
- Manage Templates: Creation and modification of templates is restricted to certain user roles. To gain access to Template creation tools, please email appmgmt@pepperdine.edu.
- FAQ: Routes you to the eSign Frequently Asked Question webpage.
- Report an Error: Submit an Error Report to our Application Development team regarding eSign.
- Logout: Click this to log out of eSign.
- Enter text to search for in progress or completed documents sent out for signature. To complete the search, hit the return key on your keyboard. Search results will appear in the "Waiting For Me", "Waiting For Others", "Completed", and "Canceled" sections below. Use the “Sort” button to sort by “Name Ascending”, “Name Descending”, “Date Ascending”, or “Date Descending”.
- Agreement List: View your existing documents by "Waiting For Me", "Waiting For Others",
"Completed", and "Canceled". The number of docs in a section is displayed with the
title (e.g. Waiting For Me (3).